Quick Start Guide
Overview
The DIY Survey Quick Start Guide provides a simplified 9-step walkthrough for creating, sending, and analyzing your survey results.
This guide covers the basics of designing a survey, setting up a contact list, sending invitations via email or embedded links, and reviewing results. Start by creating a survey questionnaire, adding contacts manually or through a file upload, and selecting your distribution method. Track engagement and completion rates, then analyze responses using the reporting dashboard for insights.
Workflow Diagram
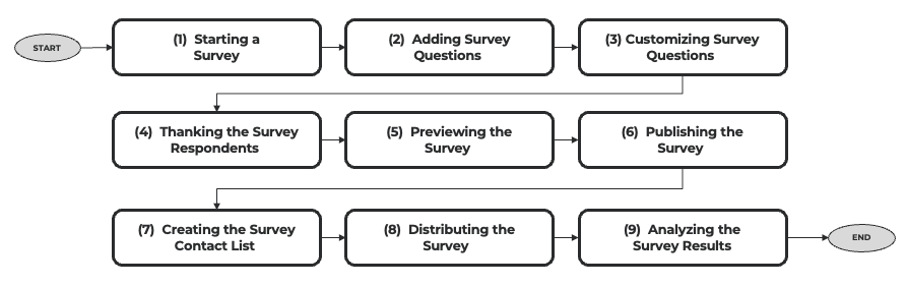
This workflow diagram provides a step-by-step overview of the end-to-end survey process in the DIY Survey Builder. It begins with creating your survey, adding and customizing questions, and continues through publishing, distributing, and finally analyzing results. Each step is designed to guide you smoothly from survey design to actionable insights.
1. Starting a Survey
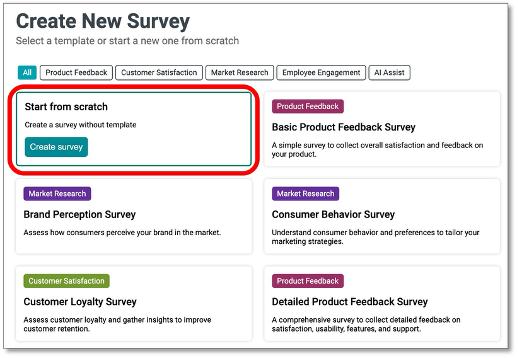
A survey can be created from scratch, by selecting a template survey, or by using AI Assist to suggest questions. For this example, we'll start from scratch.
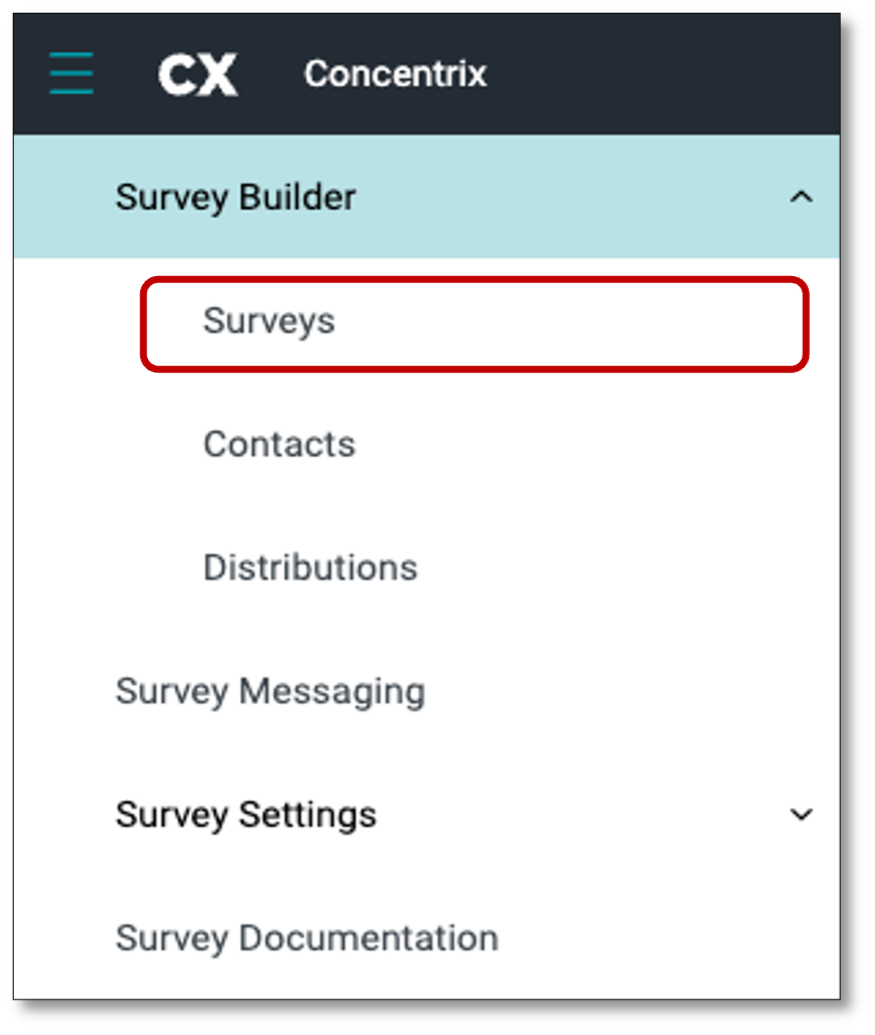
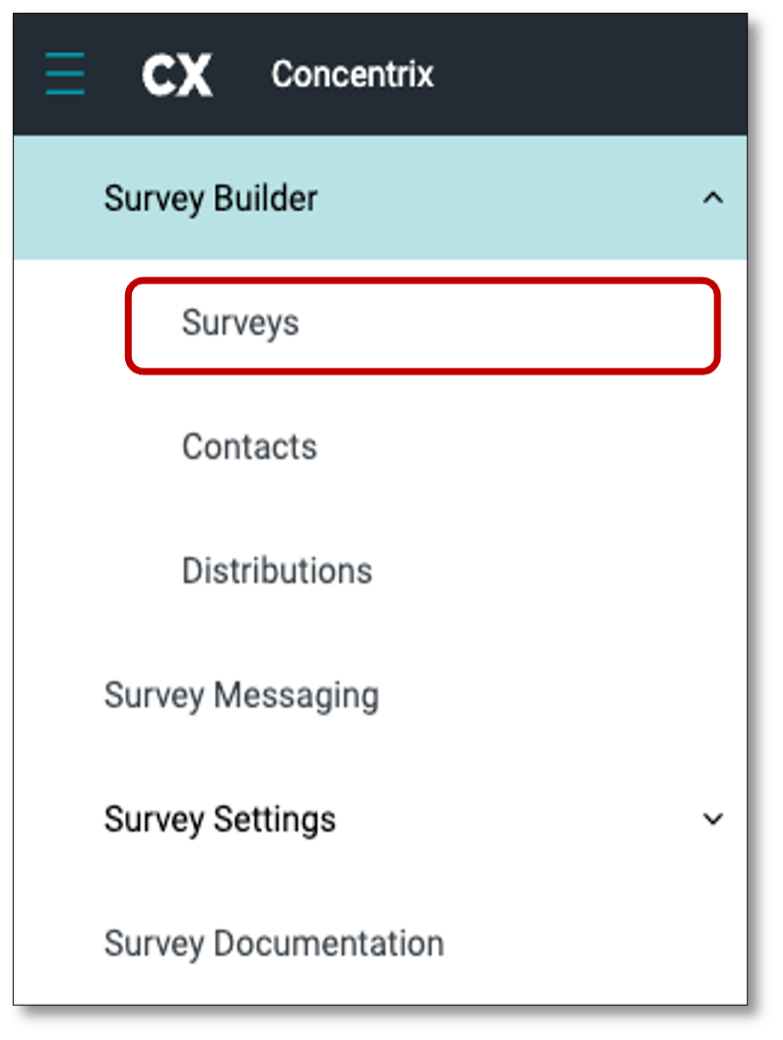
To create a survey by scratch, you must login to your Survey Builder with your account logins. Once in the Survey Builder, navigate to the top left of your screen and select the menu icon and select 'Surveys' from the drop-down. Once in your surveys, select the tab at the top right of your screen 'New Survey'.
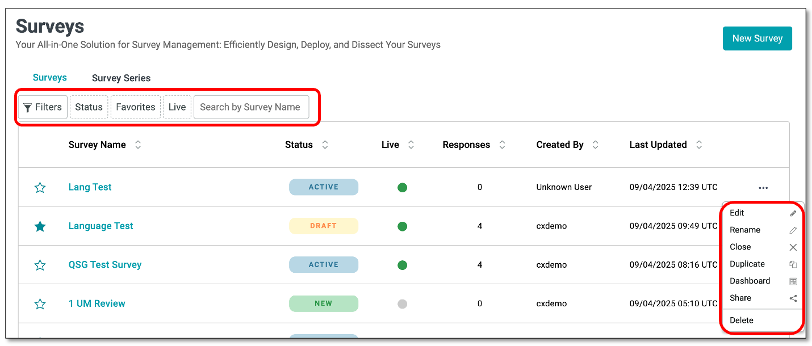
The Surveys page provides several tools to help you quickly locate and manage surveys.
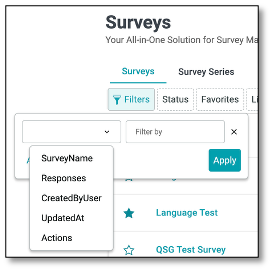
- Filters Allows you to narrow down the list of surveys based on specific attributes. From the dropdown menu, you can choose one of the following filter categories and apply conditions to refine your results:
- Survey Name – Filter surveys by their title or survey name.
- Responses – Filter surveys based on the number of collected responses.
- Created By User – Filter surveys by the user who created them.
- Updated At – Filter surveys by the last updated date and time.
- Actions – Filter surveys based on specific actions taken.
Once a filter is selected and criteria are entered, click Apply to display only the surveys that match your filter settings.
- Status Allows you to filter surveys by their current status (e.g., Draft, Active, New, or Completed).
- Favorites Displays only the surveys you've marked as favorites for easier access.
- Live Filters to show only live/active surveys that are currently collecting responses.
- Search by Survey Name A search field where you can type part or all of a survey name to quickly find a specific survey without scrolling through the list.
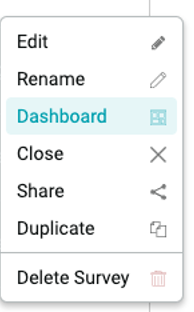
The ellipsis menu (⋮) on the far right provides quick actions for managing surveys.
- Edit – Open the survey in edit mode to update questions or settings.
- Rename – Change the survey's title.
- Close – End the survey and stop collecting responses.
- Duplicate – Create a copy of the survey for reuse.
- Dashboard – View survey results and analytics.
- Share – Generate options to distribute the survey thru a link.
- Delete – Permanently remove the survey.
Now that you are in the create a new survey homepage, navigate to the first option of creating from scratch and select 'Create Survey'.
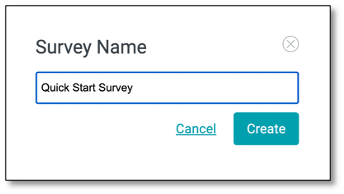
After you have selected to create a survey, you will be prompted to name the survey. This name is only for you to identify the survey. The survey name is different from the survey title. The Survey Name identifies the survey while Survey Title is the one that appears on the survey header.
Next, after you have typed a name for the survey, select 'Create'.
Once you have created the survey, under the Designer page, navigate to the panel on the right to perform various customization & configurations of your survey. A Text Editor for your survey description is available to customize text with various formatting options.

NOTE: The Survey Name you enter initially will be retained and carried over through the Designer page, Survey List, Dashboard and in the exported file.
2. Adding Survey Questions
After you have created the survey template, it is time to add your questions. We will be using only 3 types of questions in this specific example but to understand more of the different types of questions available, click the link below.
https://docs.concentrixcx.com/docs/survey/Docs/Appendix
In this first example, we will add the Radio Button Group.
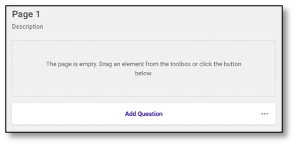
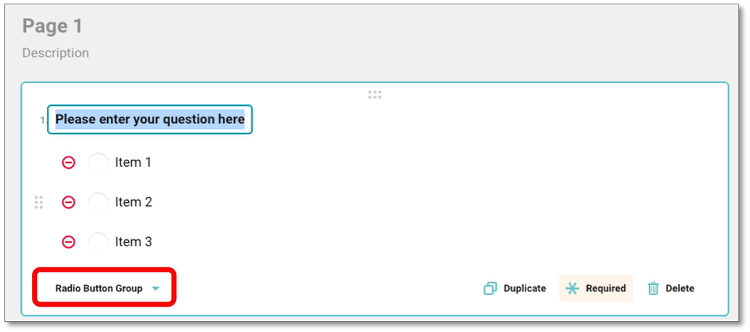
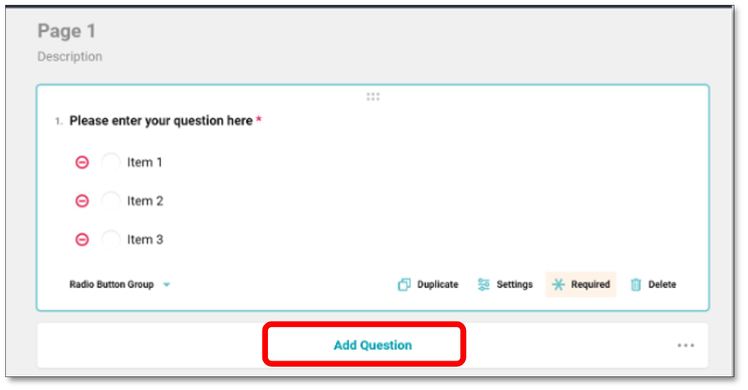
In the center panel, beneath Page 1 select 'Add Question'. By default, the added question will be a single response question also referred to as a 'Radio Button Group' which is displayed in a dropdown at the bottom left of the question panel.
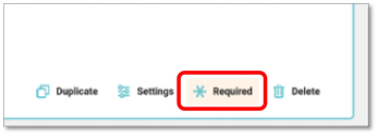
For each question you add, you will notice at the bottom of the question panel that the 'required' is highlighted, meaning, by default, all questions are required. But if you do not want a question to be required (for example an open-ended question), you can click the word 'required' to remove the highlight and not make the question mandatory.
3. Customizing Survey Questions
You may edit the question further by utilizing the General Properties panel on the right. On the General Properties panel, you may edit the question.
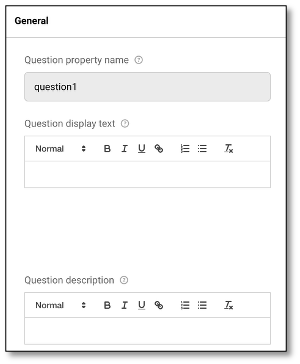
- Question property name: This name will only be visible to you and should identify the question.
- Question display text: This is the actual text shown to respondents in the form of a question.
- Question Description provides additional context or clarification about the question.
A Text Editor is available for the Question property name, Question display text and Question description, allowing you to customize text with various formatting options.
Then edit the list of responses use the 'Choice Options' drop down the general property panel. Select the item you wish to change and type in the response within the item space.
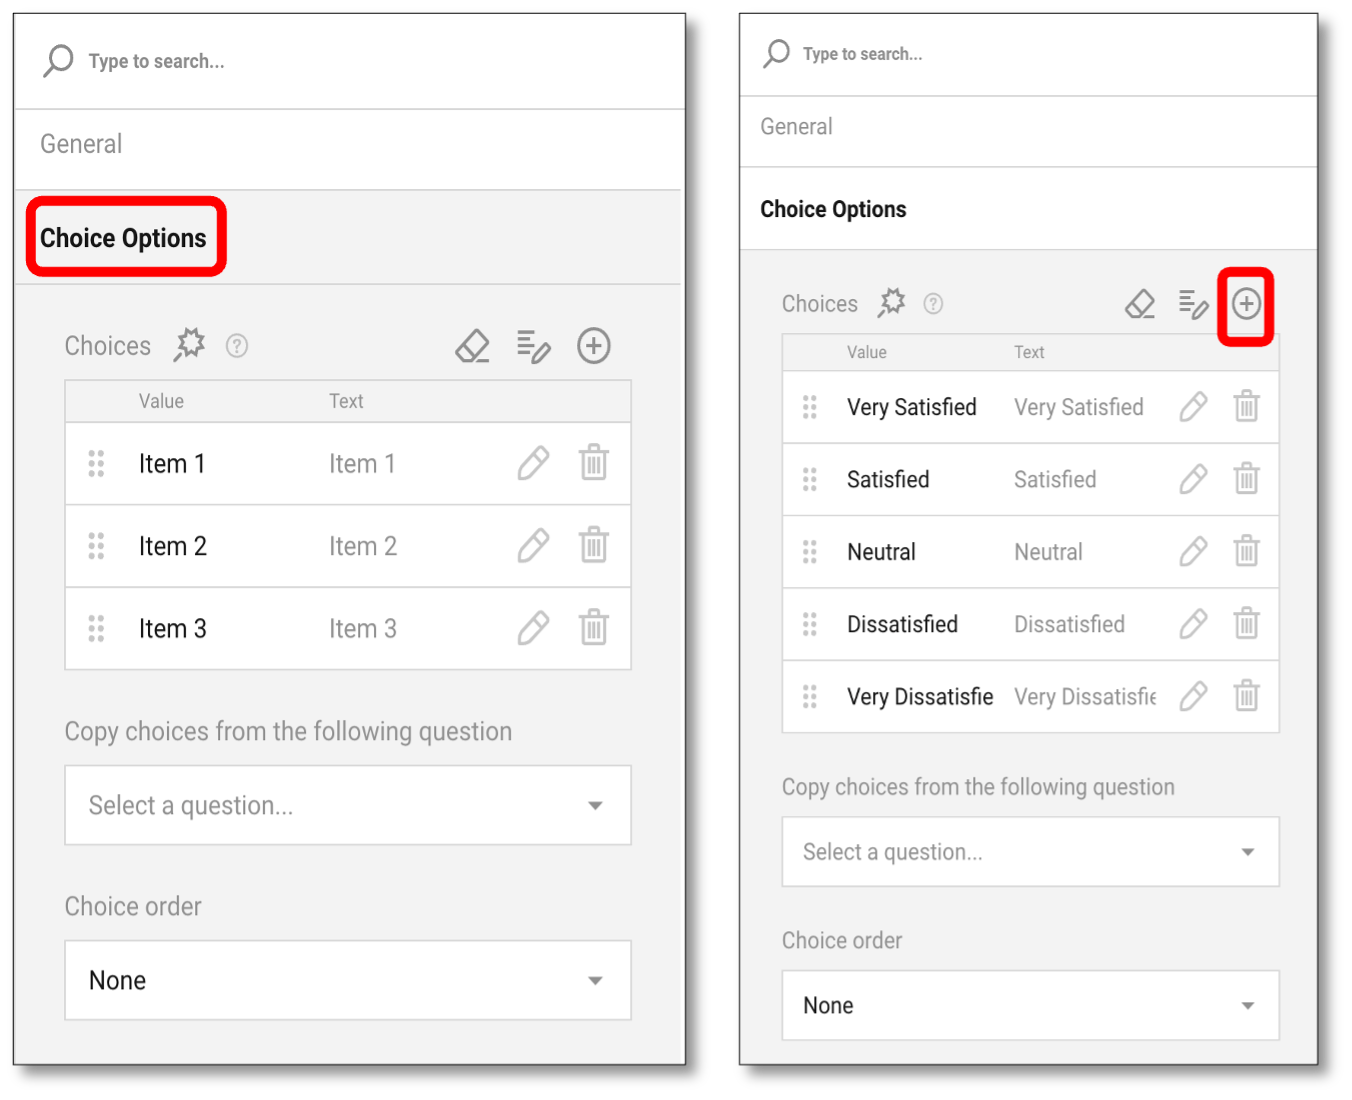
To add additional choices, select the '+' icon to add a fourth and fifth option. Edit those texts as desired. All changes will be saved automatically by the system.
💡 You can save time by copying list choices directly from an external file, such as one prepared with a concatenation formula in Excel. This allows you to paste lists into the tool without manual formatting.
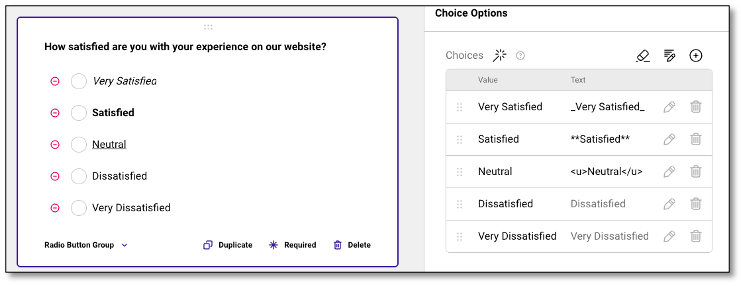
You can format your Choices by applying markup syntax to be placed before and after text or choices to define how it should be displayed. Instead of simply writing plain text, you can use these symbols to apply formatting:
_Italic_The underscores here are delimiters or markup characters that tell the system to render the text in italics.**Bold**The double asterisks are formatting symbols (or sometimes called markdown operators) that make the text bold.<u>Underline</u>This is HTML tag syntax. The and are opening and closing tags that define underline formatting.
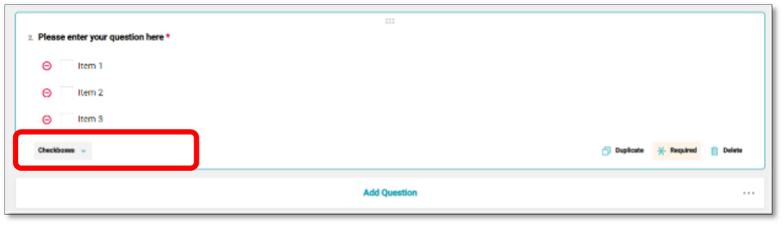
Our second type of question in this example will be using a Checkbox question, which is also known as multi-response question. To create a Checkbox question, select the 'Add Question' at the bottom of Page 1, then navigate to the bottom of the question panel and select the drop-down question type to "Checkboxes". The default is Radio Button Group, so you will need to change the question type to proceed.
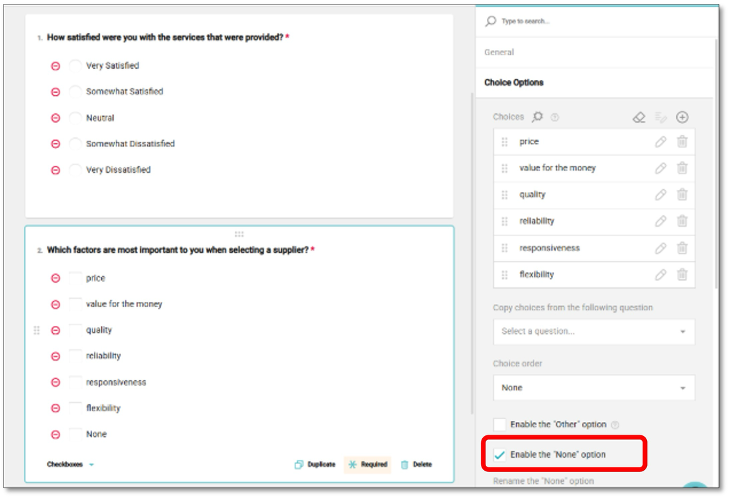
To customize the question, repeat what you did in step 3 within the properties panel. First editing the general question properties then the response list.
By selecting 'Enable the None option', the response 'None' is added to the bottom of the list.
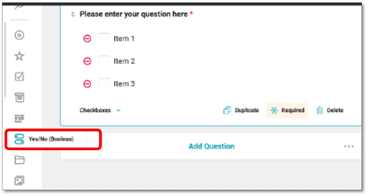
Our third question in this example, we will be creating a Yes/No or Boolean question. To create a Boolean question, we will use another option to add questions by navigating to the toolbox on the left of your screen. Select and hold on the Yes/No (Boolean) icon, then drag & drop it below the word "Description" on Page 2. The new question will then appear.
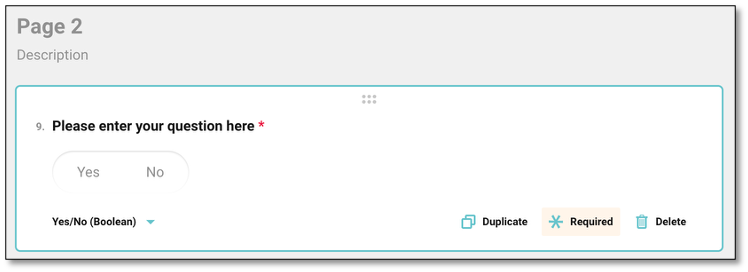
To customize the question further, repeat what you did in step 3 within the properties panel. First editing the general question properties then the response list.
4. Thanking the Survey Respondents
For this example, we want to thank respondents after finishing the survey.
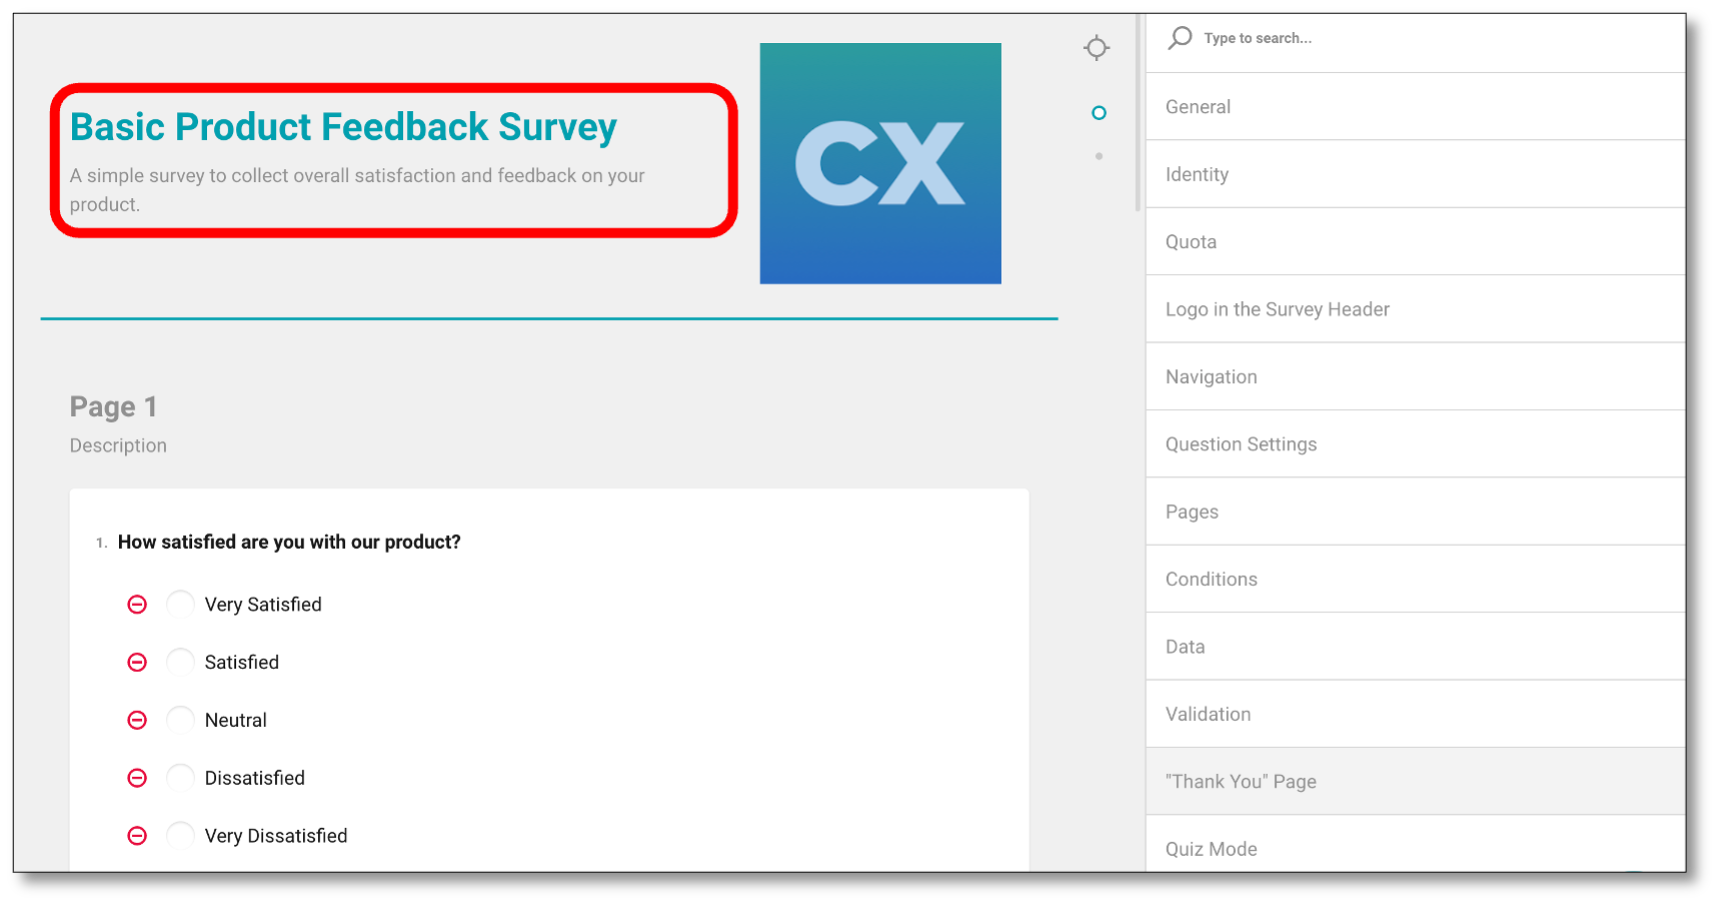
To edit the 'Thank You' page, scroll the top of the survey where the title of the survey is. Select within the title or introduction area, this will update your general properties panel.
Then navigate to your general properties panel, scroll all the way to the bottom to see the 'Thank You' Page.
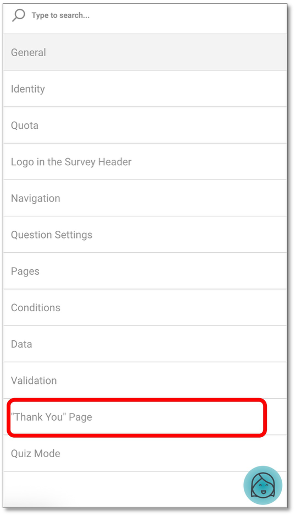
Next select the 'Thank you' page tab, you will have the ability to redirect your respondents to an external link or you may type out the thank you text you wish for your respondents to see once they have completed the survey.
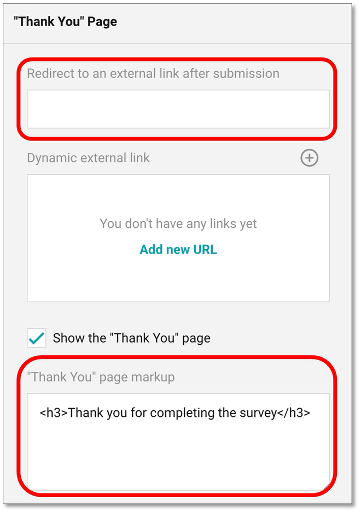
NOTE: When using the Redirect to an external link after submission option, ensure that the external link is entered in the correct format (e.g., https://www.concentrix.com) so respondents are redirected accurately.
5. Previewing the Survey
At any time, you can switch to Preview Mode to see how the survey will look to the respondents. To switch to Preview Mode, navigate to the top menu bar, and simply select "Preview".

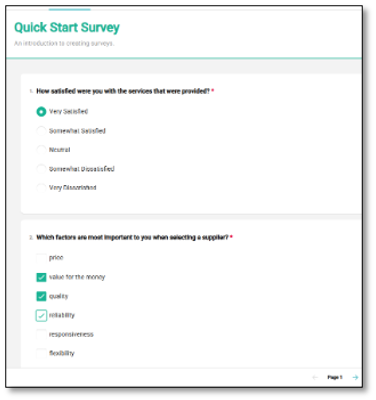
As you scroll to see the rest of the survey, the questions are presented to you as a respondent will see them, allowing you to test the functionality of the questionnaire.

💡 You can use the arrow at the bottom of the page to quickly navigate between pages without answering each question.
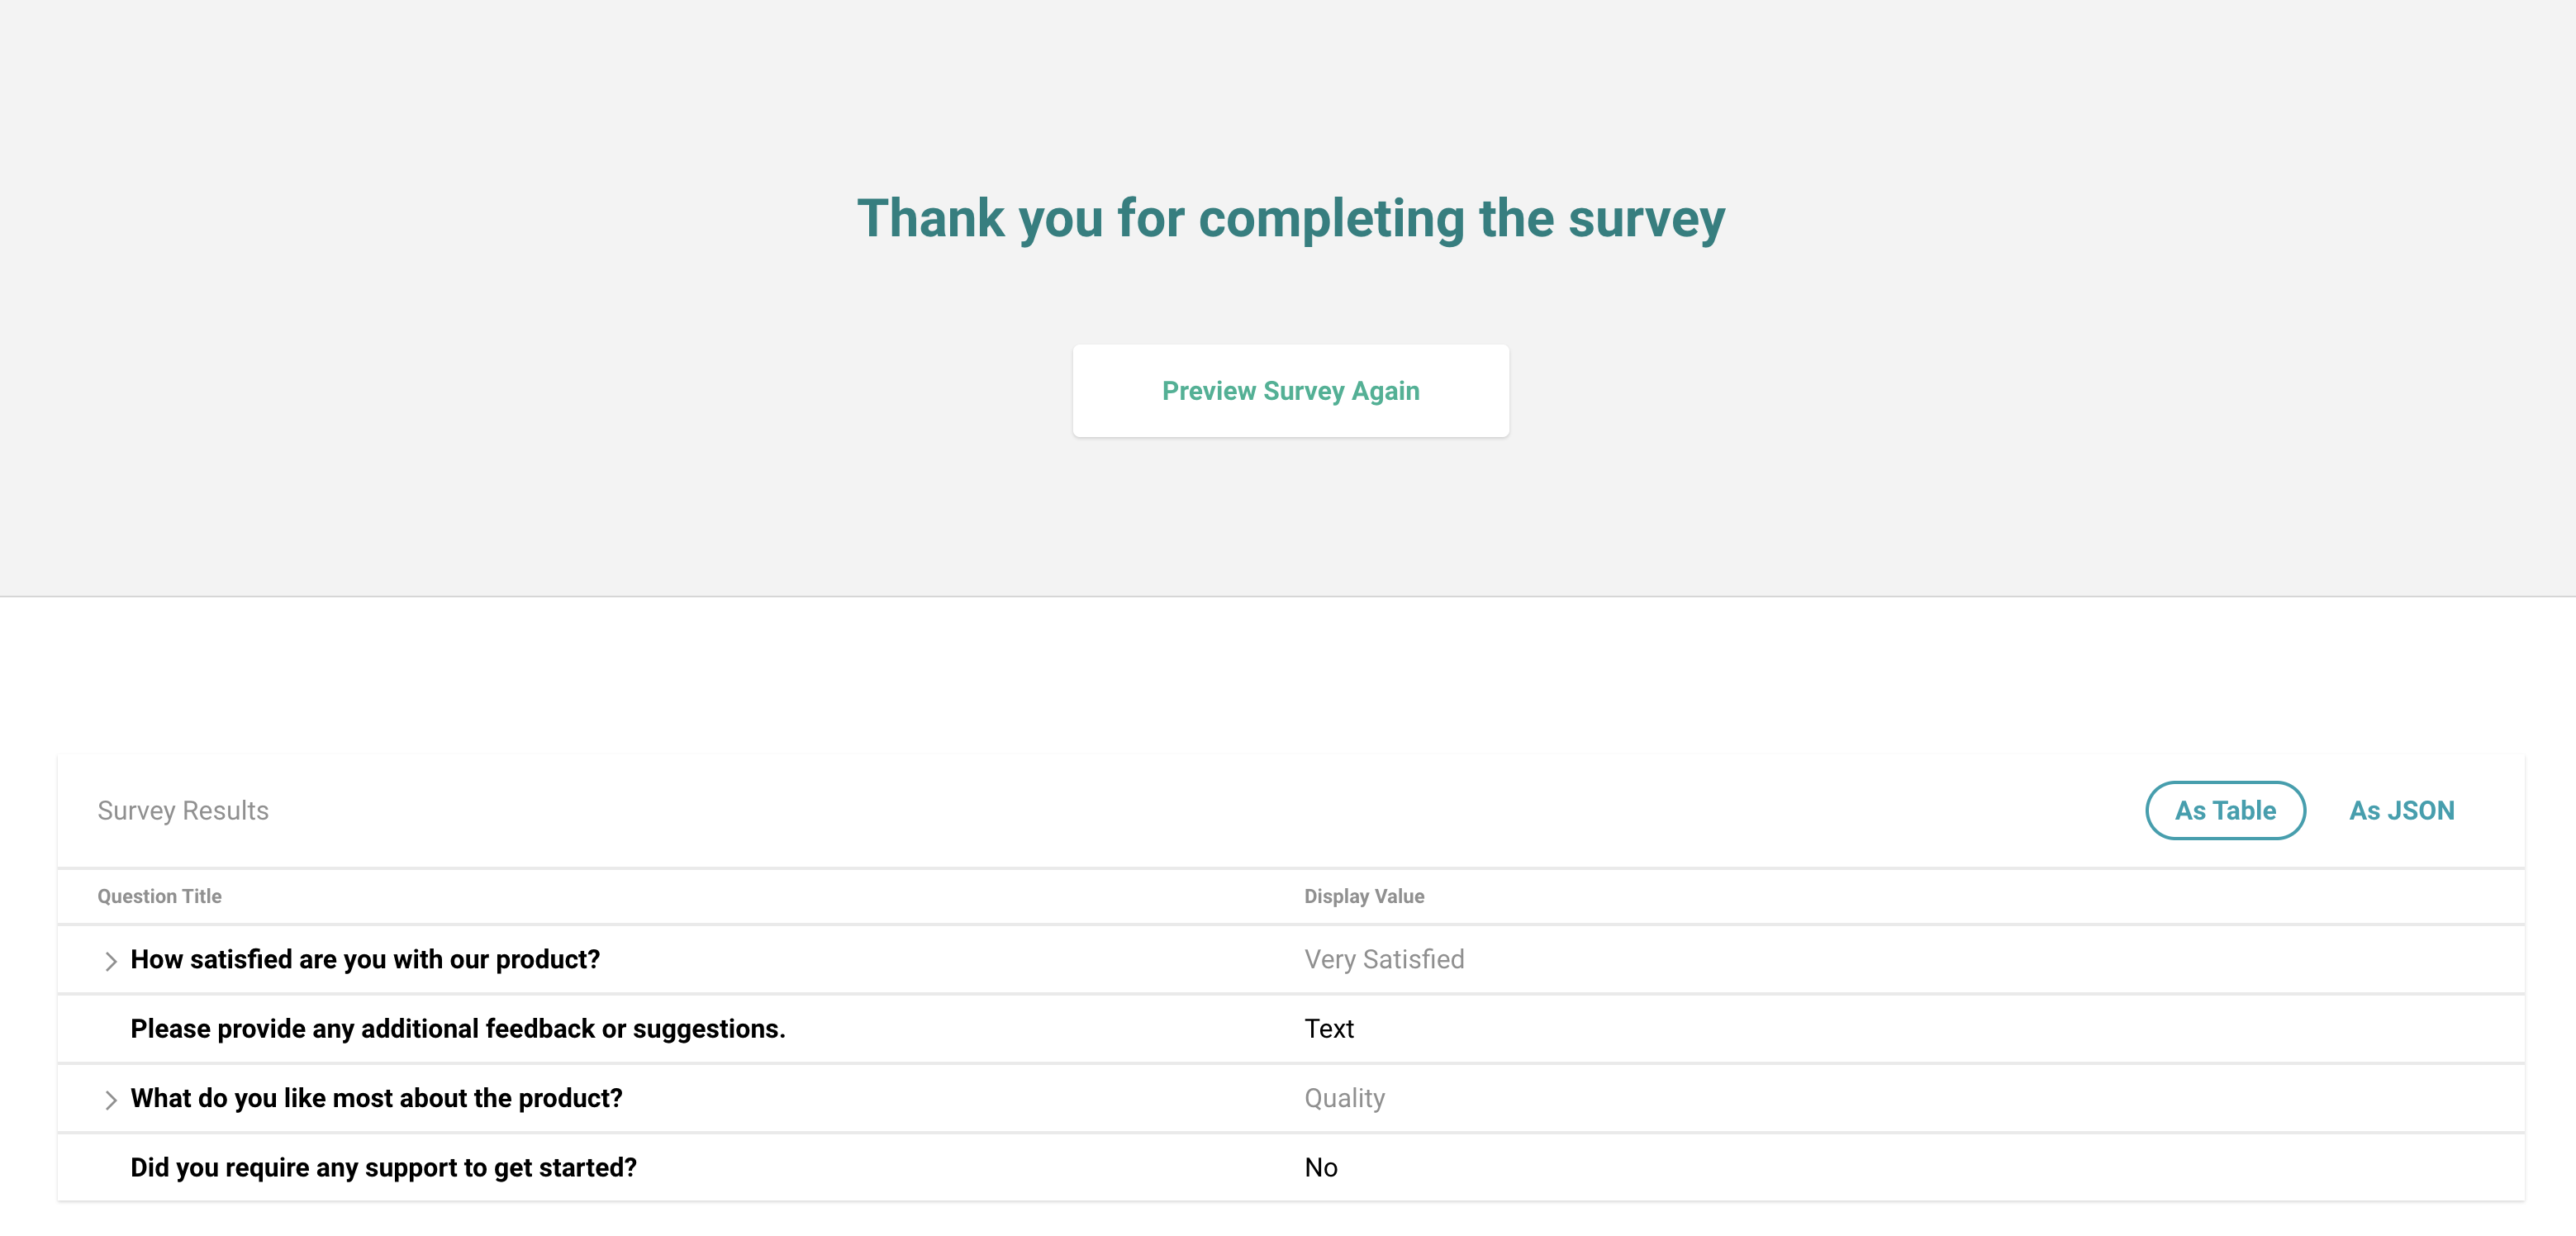
At the conclusion of a Preview, you will be presented with the "Thank You" page, and a table showing how you responded to the survey. Please note, the Thank You page external link redirects will not render during a Preview mode.

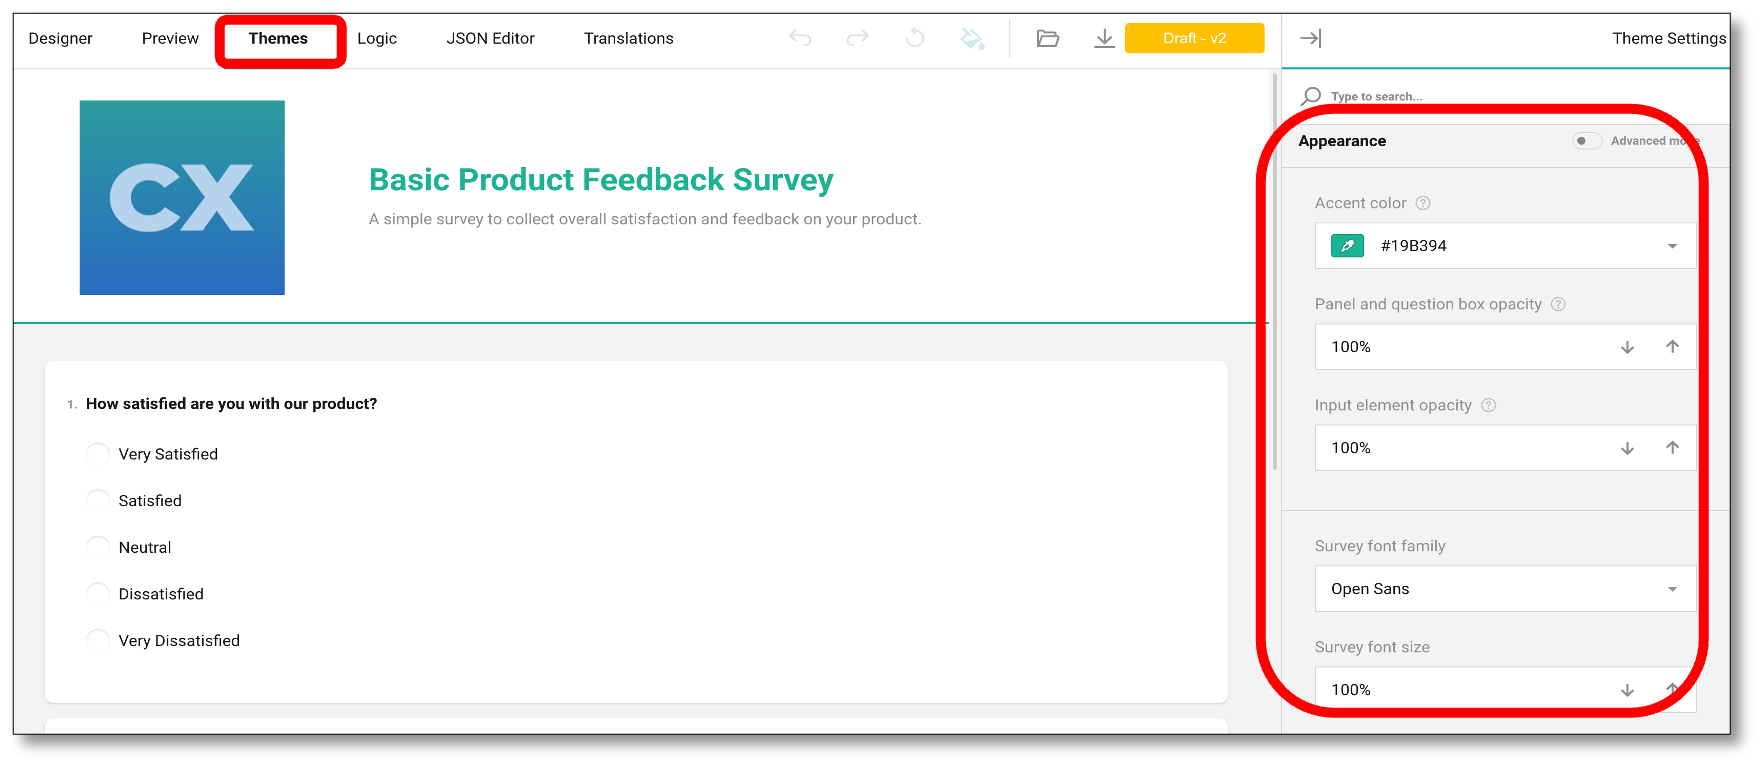
To further customize the survey while looking at the preview, you can also change the appearance under the Themes Module.
6. Publishing the Survey
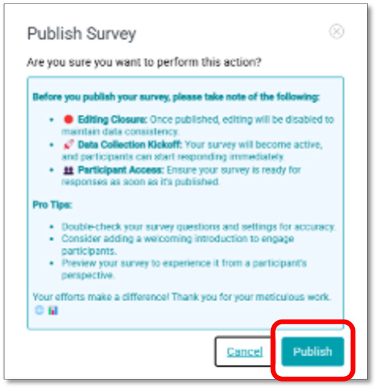
When you're satisfied that the survey is ready, it's time to publish. To publish your survey, navigate to the top right of your screen and select, 'Publish' on the main menu.

Then click 'Publish' to confirm!
The status will change on the main menu, and a message will appear at the bottom of the screen.


You can also verify if the survey is live when the status will change to 'Active' under the survey list page.
Now you're ready to send out your survey using the Distribution feature.
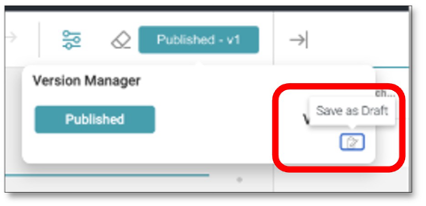
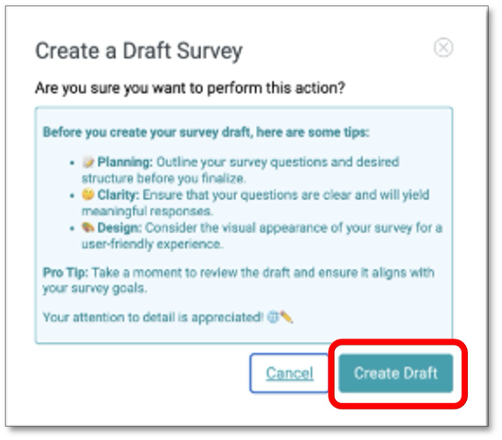
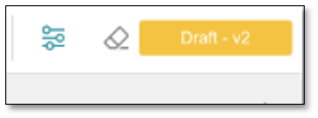
NOTE: To make changes to a published survey, start by going to the survey list page. Locate the survey you want to edit, then click the ellipsis (the three vertical dots) on the far right. From the dropdown menu, select the 'Edit' icon to return to the survey questionnaire page. In the top right corner of the screen, click on 'Published' in the main menu, then choose 'Save as Draft.' Once your edits are complete, you can follow the same steps to publish the survey again.
7. Creating the Survey Contact List
Before sending out your survey, you need to create a contact list of the people you want to reach. In this section, we'll show you how to upload a file to create a Contact Group that can be used for distribution.
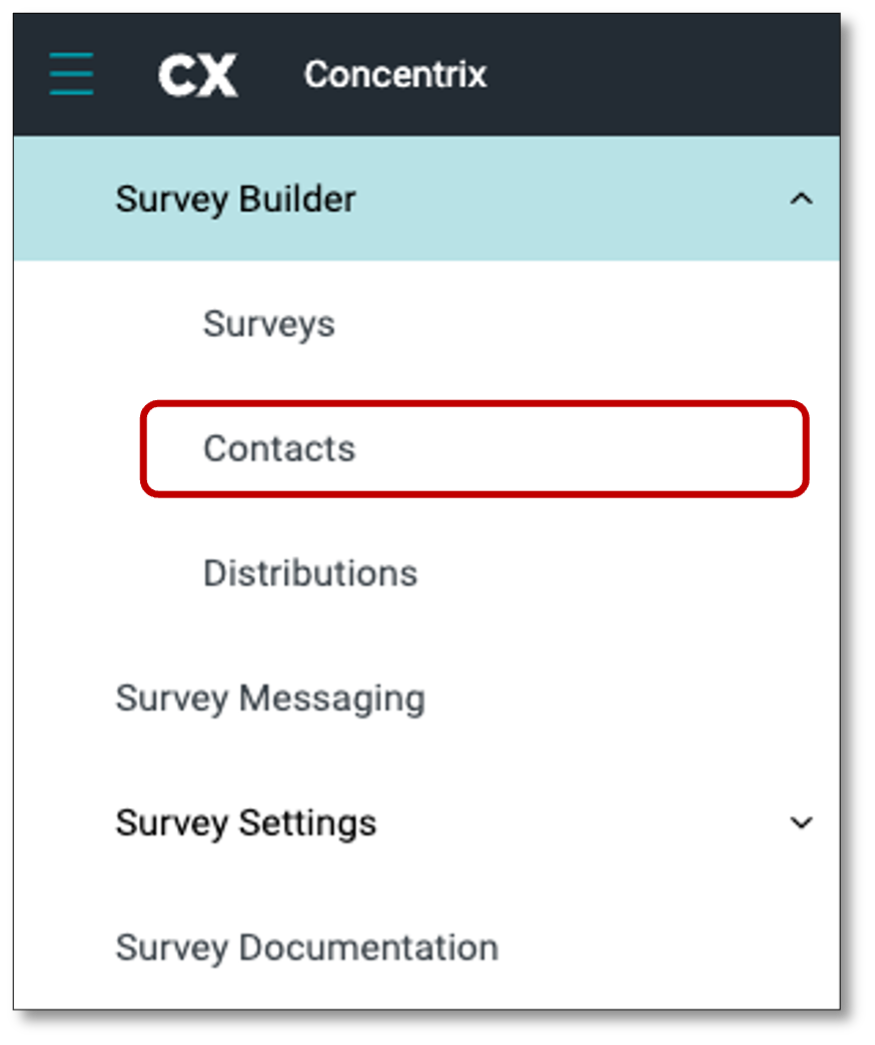
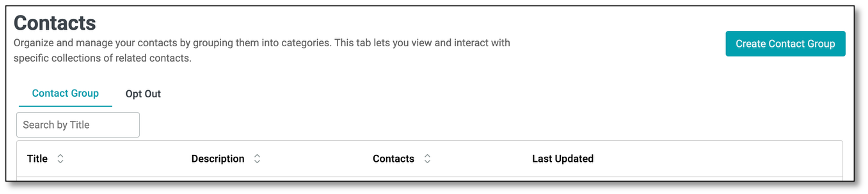
From the top-left corner of the screen, select the menu icon. When the menu bar expands, click on the Contacts tab. The Contacts tab serves as your database, displaying the complete list of your contacts. This is also where you can create a Contact Group thru file upload.
The Contact Group tab allows you to organize your contacts into reusable groups for easier management. By creating groups, you can quickly segment contacts, making it simpler to target specific audiences for campaigns or communications. From this tab, you can view, delete and update your contact groups.
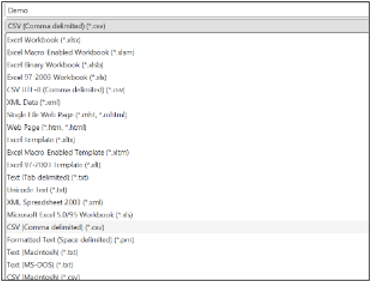
To prepare for file upload, we'll build a list of invitations in a CSV file. This is done in an Excel workbook and then saved specifically as a CSV. Follow this example below to create a short list of survey respondents in your Excel Workbook.

Your file must include at least an email address. You can also add other columns with details about each respondent. These details can help customize the survey experience and will be saved with the responses to facilitate data analysis.
Notes on the input file:
- Always include an email column containing a unique address – no duplicates.
- Limit the facts to one value per cell (e.g., don't put "Cat, Dog" in the pet column.)
Save the file as type CSV, of up to 50 MB file size.
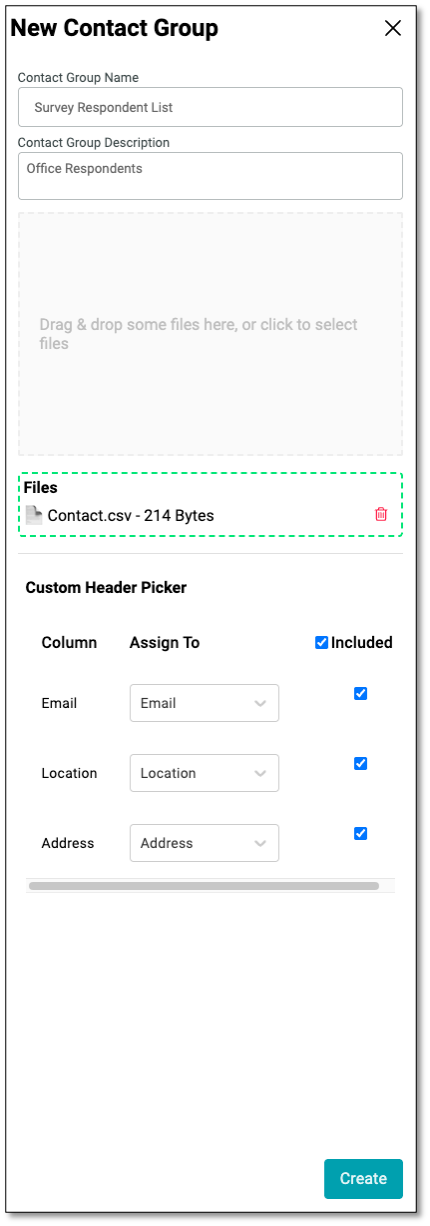
With your file now prepared, at the top left of the screen, select the menu icon, go back to your Contacts module, then select 'Create Contact Group'. Indicate your Contact Group Name and Description, then click the 'Drag & drop some files here or click to select files' canvas to upload the file.
NOTE: Contact Group Name is a required field and must be filled in before you can create a Contact Group. This will enable the 'Create' button.
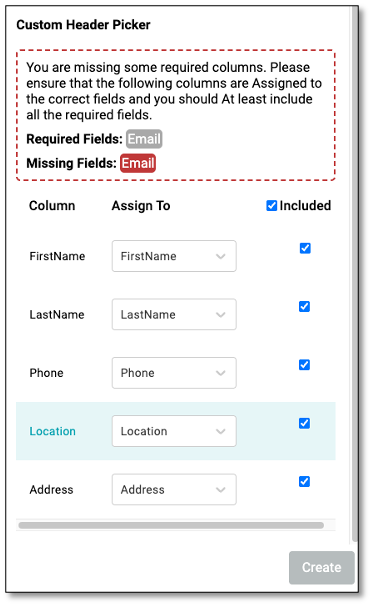
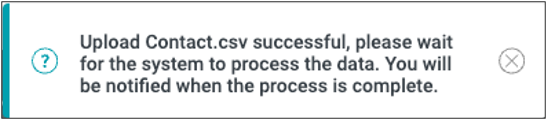
NOTE: A warning message will appear if the required email address is missing from the uploaded file.
The uploader will read the column headers and prepare to upload records. You may also choose whether to include columns in the upload. We'll include them all.
Select 'Create'.
Then you will see the Contact Group Name you created under the Contact Group tab. We now have a contact list to target with invitations. To invite contacts for participation in a survey, we will create a Distribution.
How to Add Emails to the Unsubscribe List using the Opt Out Feature
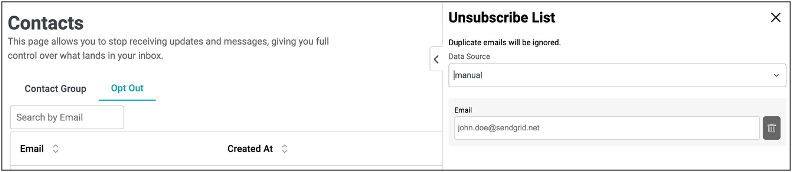
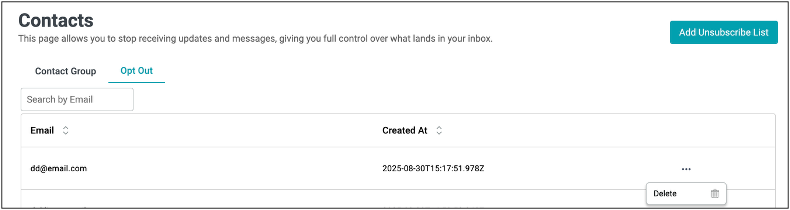
The Opt Out feature allows users to manage email preferences by unsubscribing specific contacts from receiving survey invitations, updates, or messages. Once an email is added to the Unsubscribe List, it will automatically appear under the Opt Out tab, ensuring the contact will no longer receive any communications.

To add contacts to the unsubscribe list, begin by clicking the Add Unsubscribe List button located at the top right of the screen. A new panel titled Unsubscribe List will appear, allowing you to choose the data source.
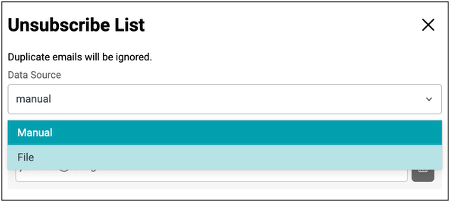
You can either select Manual to enter individual email addresses one at a time or choose File to upload a CSV file containing multiple email addresses. Once you have entered or uploaded the email addresses, the system will automatically ignore any duplicates to prevent redundancy. Finally, click Create button to complete the process and it will automatically add the email/s to the unsubscribe list table.
To resubscribe an email, simply remove it from the list by clicking the Delete icon found under the ellipsis menu.
NOTE: Survey Respondents who select the 'Unsubscribe' option from the link in the survey invitation will automatically be added to the Opt Out list.
8. Distributing the Survey
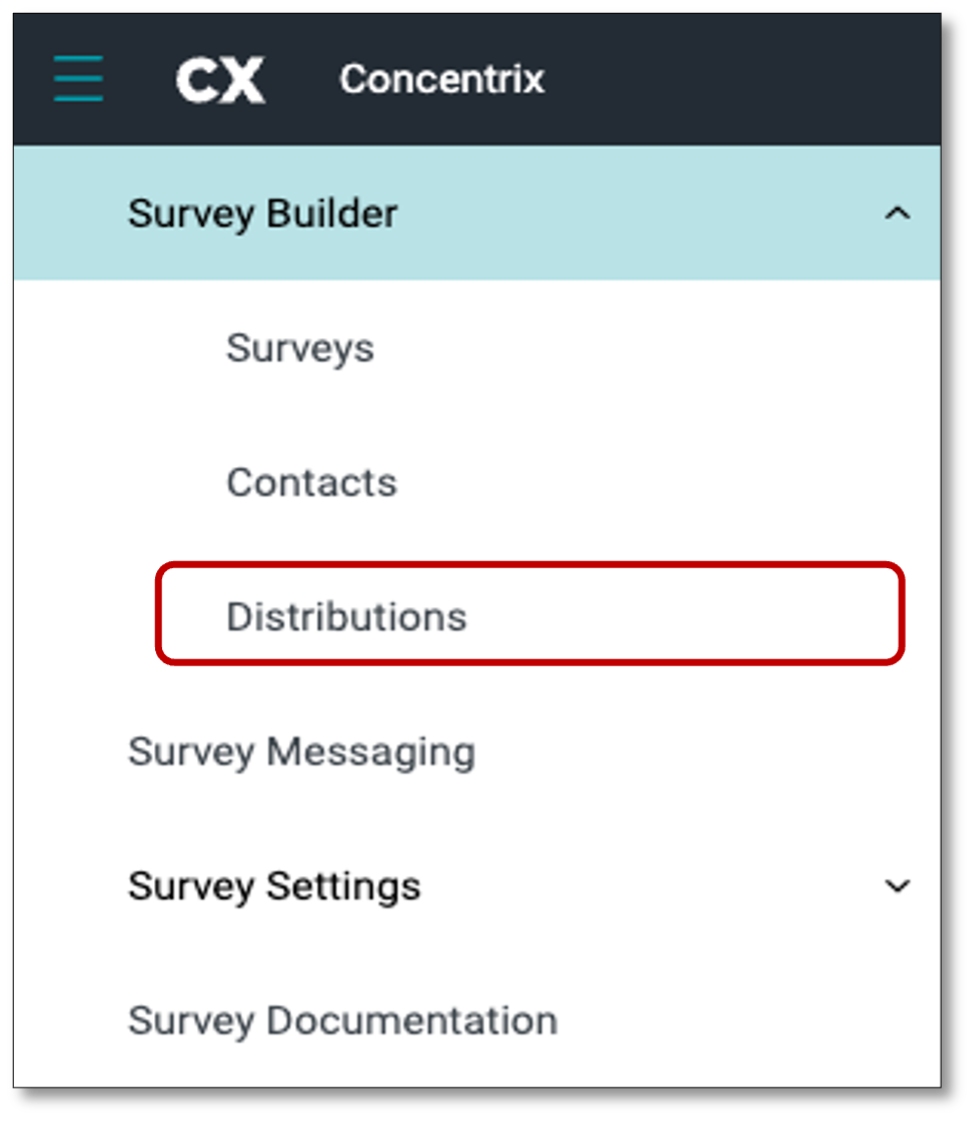
After creating our contact list, it is time to distribute the survey. To distribute your survey after it is published, navigate to the menu icon at the top left of your screen. Select the Distributions Module to begin sending out your survey.
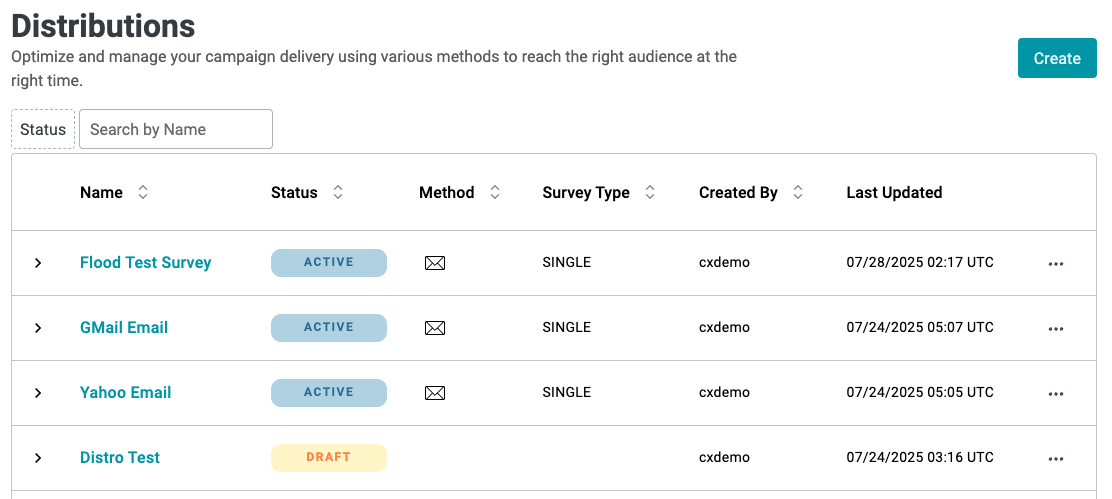
First you will see the Distributions table that provides a summary of all configured survey campaigns, showing key details such as the distribution name, current status (e.g., Active or Draft), distribution method (email in this case), survey type (Single or other), the creator of the campaign, and the last time it was updated.
This section helps you easily track and manage ongoing and draft distributions, ensuring timely delivery to the intended audience.
NOTE: Users can use the "Search by Name" box to quickly locate a specific distribution name instead of scrolling through the entire list.

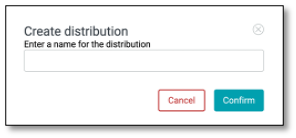
Navigate to the top right of your screen and select the 'Create' button. To start a new campaign. Enter the name of for the distribution, and click the Confirm button.


In the 'Distribution Details' tab, you will be prompted to type in the distribution name and a description along with the method you wish to send the campaign. You can choose to Email or Embed the survey to distribute.
- Email: Delivering the survey through the respondent's email
- Embedded: Deliver in-app surveys or website intercepts by embedding them into your website or application – COMING SOON!
NOTE: There's another option to distribute the survey, thru Share URL: Sending the survey using the 'Share' button with the survey link. Refer to the Survey List page, look for the ellipsis icon (the three vertical dots).
In this example, we'll choose 'Email' as the distribution method. Click on the Mail icon as illustrated below.
After you have completed those tasks, select the 2nd tab at the top of your screen to move to the 'Survey Details' tab. Select the survey type you wish to distribute.
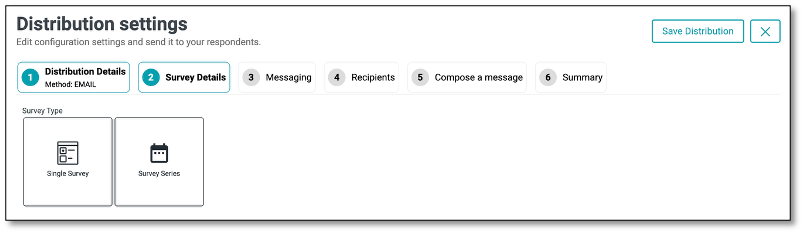
There are two types of surveys:
-
Single Survey is designed to provide feedback on a specific survey. It can be scheduled to appear multiple times within a designated period, offering respondents multiple chances to participate. If no start or end date is specified, you can configure the occurrences to determine how frequently the survey is displayed based on a selected time interval. When this type is selected, the Reminders tab will become available, allowing you to enable and configure reminders if needed.
-
Survey Series is a structured collection of multiple surveys that are sent out in a predefined order over a period of time. This allows for a more comprehensive assessment by collecting insights at different stages or from various perspectives.
For this example, we will only be using the Single Survey.
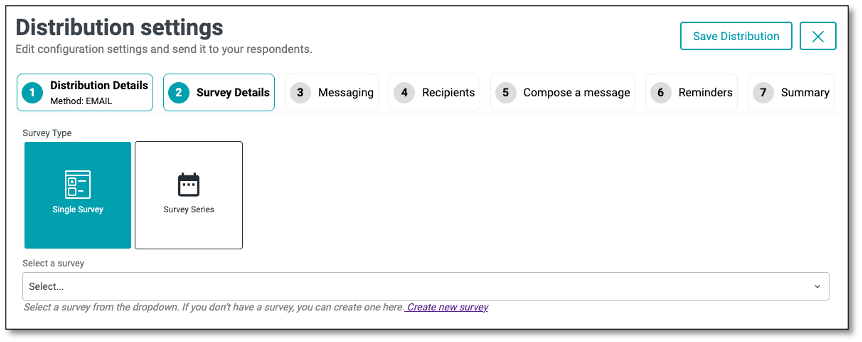
To distribute a Single Survey, navigate to the distribution settings and select 'Single Survey'. Once in the Survey Detail, select 'Single Survey' within the survey type options. By selecting the Single Survey, you will see a dropdown appear. Select the surveys you create to be used for distribution.

Once you have chosen a survey, you can customize the start and end date including the time of the survey by selecting the 'Start and End Date' option on the far right of the survey you wish to edit. A calendar will appear for you to select the start and end date of your survey distribution. Select the '>' and '<' at the top of the calendar to adjust the month on the calendar. Once you have chosen a start date, select the dropdown again to use the calendar to choose an end date, and the time.
If you would like your recipients to remain Anonymous, enable the 'Use anonymous survey links', recipients will not receive personalized URLs, and their responses will not be tracked.
To have recipients have a username or password protected enable the 'Secure with username'
Username Once you enable Secure with username, respondents will receive an email with their username, which they can use to log in to the survey.
Password Once you enable Secure with password, respondents will receive an email with their password, which they can use to log in to the survey.

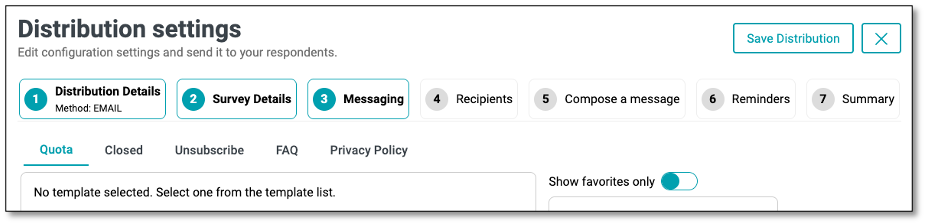
Next step is the 'Messaging' tab, it allows you to configure the different communication pages and templates that respondents may encounter during a survey distribution. This ensures consistent branding, clear instructions, and better respondent experience.
Available Messaging Sections:
- Authentication Set up custom messages for login or access authentication pages to ensure only authorized respondents can participate. This option is available only when 'Secure with Username' feature has been selected.
- Quota Configure the message shown when the survey quota has been reached, informing respondents that no further responses can be accepted.
- Closed Define the custom message displayed when the survey has ended or is no longer accepting responses.
- Unsubscribe Create a branded unsubscribe page template that allows respondents to opt out of future survey invitations.
- Resubscribe Allow respondents who previously opted out to rejoin and receive future survey invitations by accessing a branded resubscription page.
- FAQ Provide a Frequently Asked Questions page to help respondents find quick answers and reduce confusion.
- Privacy Policy Display a privacy statement outlining how respondent data will be collected, used, and protected.
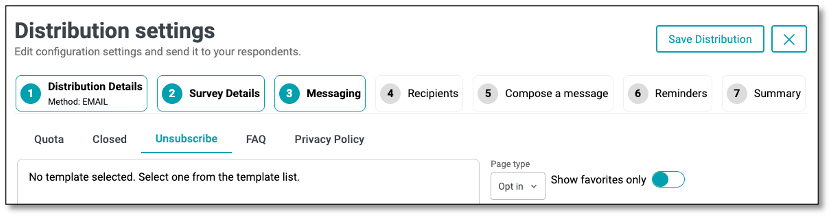
The Opt-In/Opt-Out functionality in the Unsubscribe tab allows you to control how recipients manage their participation in future survey communications.
- Opt-In: Allows respondents to confirm their interest in receiving future survey invitations. Use this when consent is required before including them in future outreach.
- Opt-Out: Gives respondents the option to unsubscribe from future survey communications. Ideal for letting users easily opt out via email links or unsubscribe pages.
NOTE: Use these settings to comply with data privacy policies and provide respondents with control over their communication preferences.
Template Selection
On the right side, you can select from a list of available templates (e.g., Untitled, Test template, Log in Page). Each template can be previewed, reused, or marked as a favorite for quick access. Toggle Show favorites only to filter the list to your most frequently used templates.
NOTE: Templates can be configured by users with the appropriate access level under the Survey Messaging section from the main menu
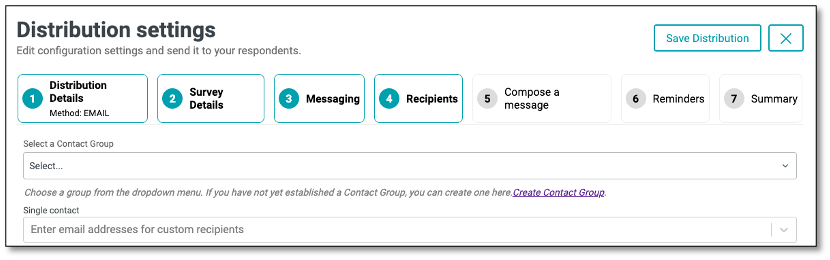
After you have input the survey setting, select the fourth step within the distribution process of choosing the recipients. In the 'Recipients' tab, utilize the dropdown to select either an entire contact list from the lists you previously created or a single contact.
Next, you can create a message that your recipients will receive when getting the survey. This can explain the purpose of the survey or instructions on how to complete it. To 'Compose a Message' tab, select the fifth step within the distribution.
Before we dive into composing a message, let's first explore the Builder Option feature, which allows you to customize messaging for our survey respondents.
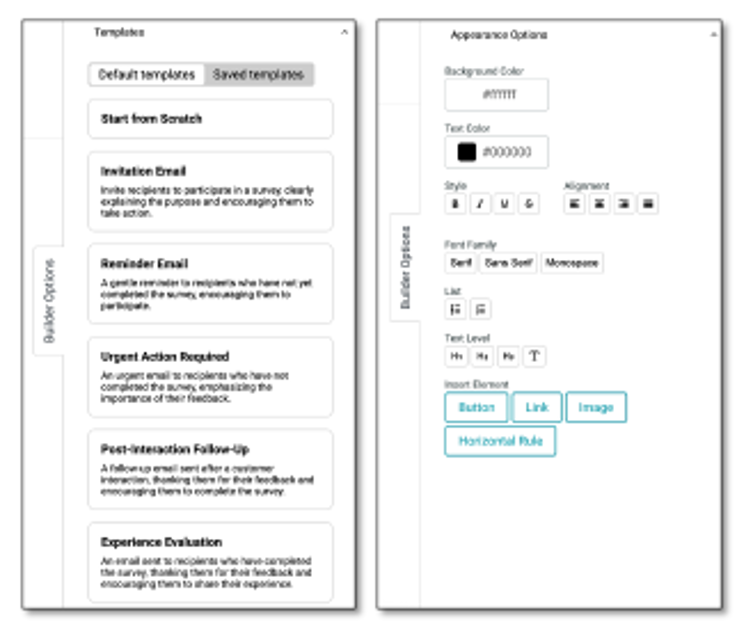
The Builder Options – Templates panel lets you create survey-related emails by starting from scratch or using pre-designed templates. Choose from ready-made default templates you can use or customize, or access saved templates you've previously created for quick reuse.
The Builder Options – Appearance Options located at the bottom of the Templates tab, this panel lets you format and style your survey email. You can adjust fonts, colors, and alignment; apply bold, italics, and headings; insert buttons, links, images, or dividers; and customize backgrounds and lists to match your branding.
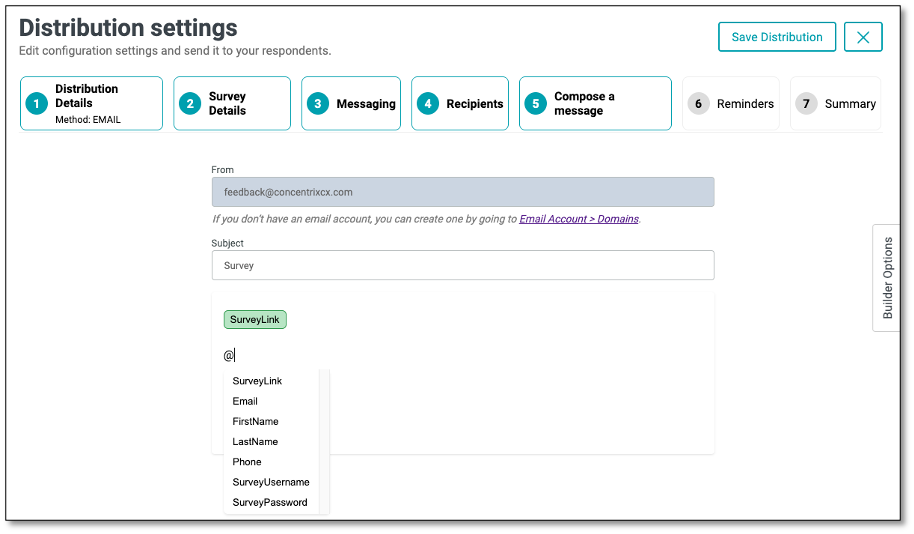
To compose your message, select first create a subject of your message. Then begin typing your message. To insert a survey link, simply use the '@' symbol again and select the appropriate link. You can personalize your message by using the '@' symbol, which lets you insert dynamic fields such as the recipient's First Name, Last Name, Email, or Phone Number. The @ functionality pulls in the fields from the Single contact or Contact list under the Recipients tab. Once your message is complete, you have the option to save it as a template for future use.
When composing your message, you have the flexibility to customize the content by modifying the font, color, and paragraph alignment using the editing tools provided. These features allow you to personalize and format the message to fit your needs.
💡 You can further customize your email subject line by adding emojis or symbols for added emphasis and personalization. Simply right-click in the Subject field and select "Emoji & Symbols" from the menu to insert icons that can help your message stand out in the recipient's inbox.
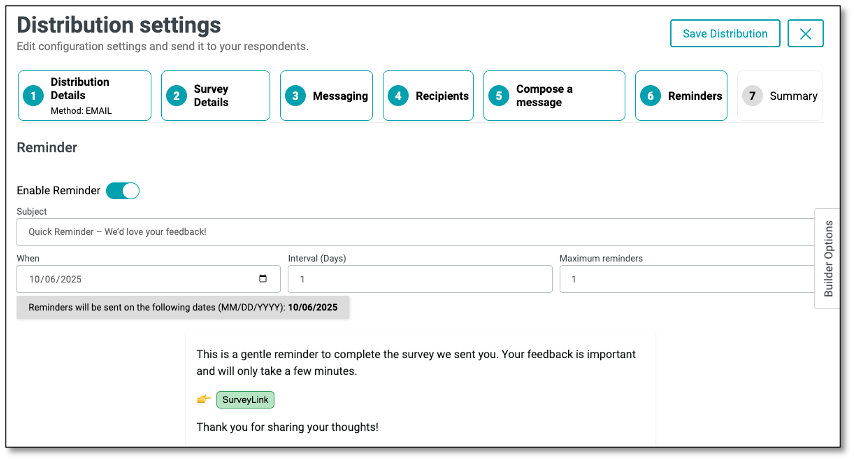
Once you’ve set up your email message, you can choose to send reminders to your survey respondents under step 6. In the ‘Reminders’ tab, you can configure automated follow-up emails for recipients who haven’t completed the survey, specifying when the reminders will be sent and how often they should occur.
Enabling Reminders
The Reminder feature helps ensure higher survey response rates by automatically sending follow-up emails to recipients who have not yet completed the survey. Within the Recipients tab, you can enable and configure reminders to be sent at scheduled intervals, set the maximum number of reminders, and personalize the message. This feature provides a simple yet effective way to keep participants engaged and encourage timely responses.
NOTE: Ensure that all fields are completed, as each one is required to proceed.
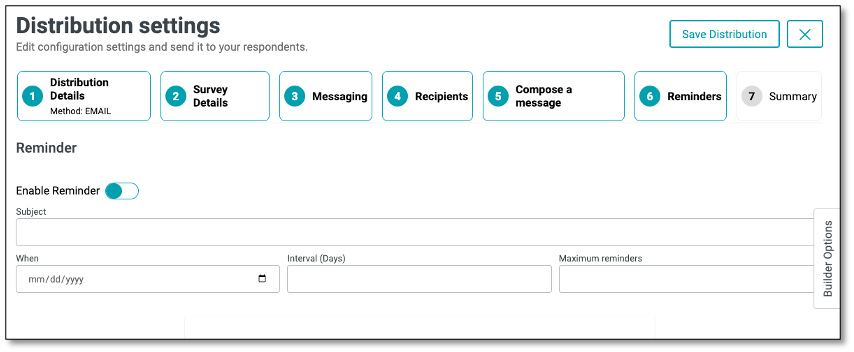
Once enabled, you can configure reminder details:
- Subject: Enter a subject line for your reminder email.
- When: Choose the start date for when reminders should be sent.
- Interval (Days): Set how many days apart reminders will be sent.
- Maximum Reminders: Define the maximum number of times reminders should be sent. Once the maximum number of reminders has been reached, no additional reminders will be sent.
- The message you create in the Reminder section will serve as the actual email content sent to recipients when the reminder is triggered.
NOTE: The reminder feature is available only when using the Email method and applies exclusively to Single type surveys.
The Builder Options feature provides tools to customize your email messages. Through the Templates panel, you can quickly create messages by choosing from ready-made default templates or reusing saved ones, helping streamline invitations, reminders, and follow-ups. If you wish to use the same template for both your initial message and your reminder, save your initial message as a template in Step 5 – Compose a Message, then select that template from the Templates panel in Step 6 – Reminders. You can further modify your reminder message if needed.
Additionally, the Appearance Options panel allows you to design and format your emails to match your branding by adjusting fonts, colors, alignment, and styles, as well as adding buttons, links, images, or dividers for better engagement and readability.
After saving, a Scheduled Reminder summary will display the configured settings.

Managing Reminders from the Distribution List
On the Distribution List page, all active campaigns are displayed in a table with details such as campaign name, type, creator, and schedule. Next to each campaign, you can click the ellipsis menu (⋮) to access additional options. From here, you can:
- Edit the distribution
- Stop Reminders
- End the Campaign
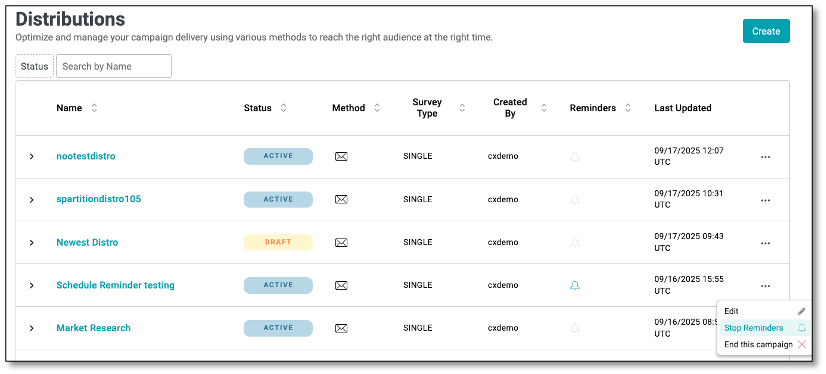
NOTE: The bell icon under the Reminder column indicates the reminder status of each campaign. An active bell means reminders are scheduled and will be sent to recipients, while an inactive bell means no reminders are set.
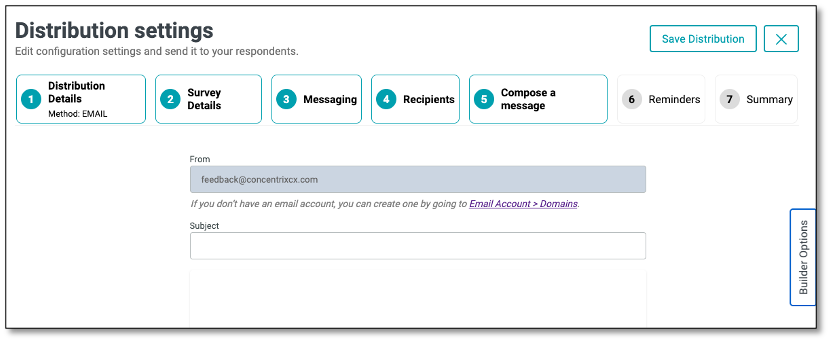
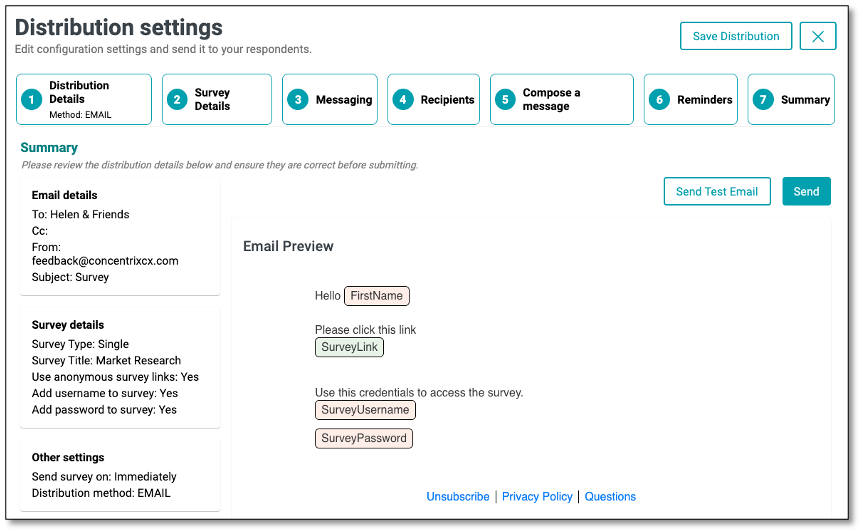
Proceed to the 'Summary' 'tab to review your work. The "From" field should display the email account configured under the Email Account menu.
You can save this Distribution by clicking the Save Distribution button located on the upper right hand of the page.
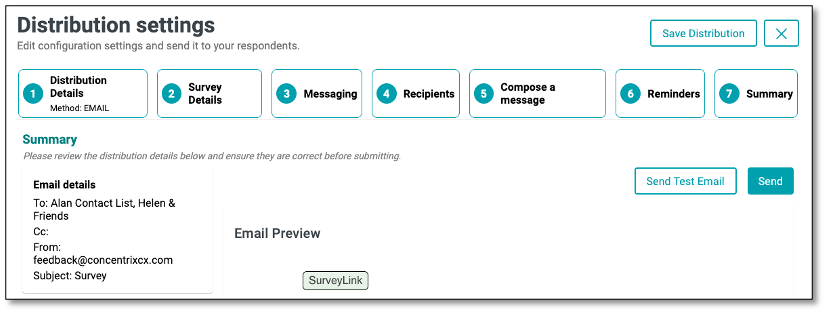
The Summary section provides an overview of key distribution details, including Email Details, Survey Details, and other relevant settings. This section serves as a final review point to ensure that all information is accurate and properly configured before sending out the survey for distribution.
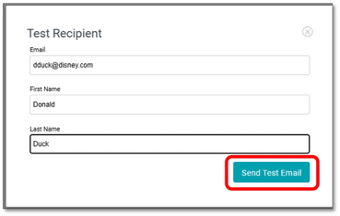
Now we can click on 'Send Test Email' to see the invitation in action.
At any time that you need to pause and save your progress, you can save this Distribution by clicking the 'Save Distribution' button located on the upper right hand of the page.
Sending Out the Distribution
When you're confident that everything is ready to send to your contact list, From Step 6, click 'Send'. Your invitation will be sent to your contact list, and data collection begins!
When the invitation is received and the respondent clicks on the URL, they will be able to complete the survey, and the corresponding data will be collected on the platform.
Distribution Dashboard
The Survey Distribution dashboard provides a summary of key performance metrics, email activity insights, and visual analytics to monitor your survey's progress and respondent behavior.

NOTE: This Dashboard view shows results limited to data collected as part of the associated Distribution. Any changes made in this dashboard will not affect the Survey Dashboard views
Metrics and Components
Average Response Time Displays the average time taken by respondents to complete the survey.
Completed Responses Shows the total number of respondents who have fully completed the survey.
Ongoing Displays the number of surveys currently in progress but not yet submitted.
Email Activity Provides a breakdown of the email invitation performance:
- Sent: Total emails sent.
- Bounced: Emails that failed to deliver.
- Spam: Emails flagged as spam.
- Failed: Failed delivery attempts.
- Deferred: Emails delayed for later delivery.
- Open: Emails opened by recipients.
- Click: Emails where the recipient clicked the survey link.
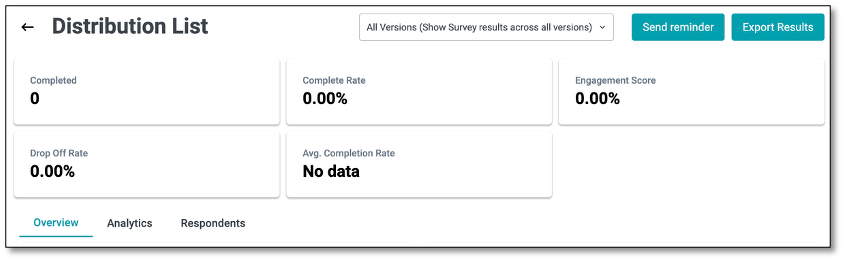
Main Tabs
- Overview tab gives you a quick summary of key metrics like completion rates, engagement levels, and response patterns.
- Analytics tab offers visual insights with charts, graphs, and word clouds to help you interpret results at a glance.
- Respondents tab allows you to drill down into individual participant data, view responses, and manage respondent information.
NOTE: You may refer to the Survey Dashboard main tabs for the detailed description and sample screen shots
9. Analyzing the Survey Results
To gather your data, navigate to the menu icon at the top left of your screen. Select the Surveys tab.
To view the results, you have two options to access the survey dashboard:
- Go to the Survey Builder menu and select Surveys from the drop-down list to access the list. From there, click on the survey name to be taken directly to the survey dashboard
- Navigate to the far right of the survey and select the ellipsis icon (the three vertical dots). After you have selected the ellipsis icon, select the 'Dashboard' option. This will bring you to the results of your survey. Once in the dashboard, you will be able to see the respondents answering the survey.
NOTE: This Dashboard view lets you see all results associated with a particular Survey, regardless of which Distribution was associated with the data. Any changes made in this dashboard will not affect the Distribution Dashboard views
Survey Dashboard
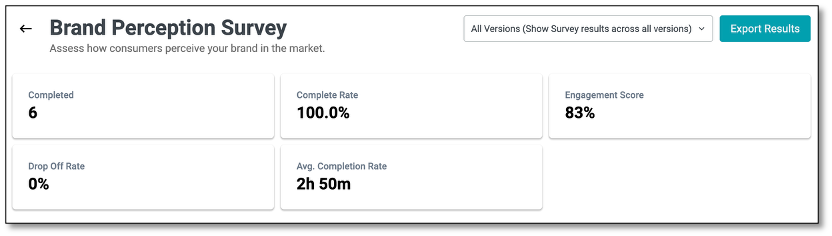
The Survey Dashboard provides a comprehensive view of your survey's performance and responses. It is divided into three main tabs—Overview, Analytics, and Respondents—each designed to help you monitor participation, analyze feedback, and review individual responses efficiently.
The Metrics displayed at the top offer a quick summary of survey performance. Additionally, the Export to File feature allows you to download survey results in a customizable format for further analysis or reporting. You can configure export settings, select the data types to include, and choose the file format that best suits your needs.
All Version (Show Survey results across all versions)
At the top right of the page, you'll find the All Versions option. Selecting this ensures that responses from all survey versions—whether participants completed the original or any updated version—are included in the results.
This feature allows you to view and export data from all published versions created through the Draft and Publish process. It is especially useful when you need a comprehensive dataset that consolidates responses across every iteration of the survey for analysis or reporting purposes.
Main Tabs
- Overview tab gives you a quick summary of key metrics like completion rates, engagement levels, and response patterns.
- Analytics tab offers visual insights with charts, graphs, and word clouds to help you interpret results at a glance.
- Respondents tab allows you to drill down into individual participant data, view responses, and manage respondent information.
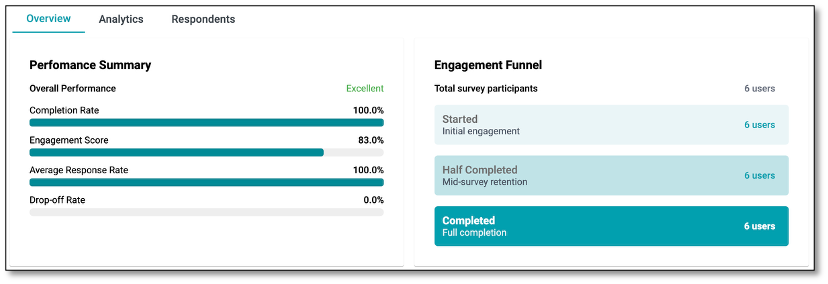
Overview Tab
The Overview tab provides a high-level summary of your survey's performance and engagement metrics. It gives you quick insights into how respondents are interacting with your survey.
Key Components:
- Performance Summary: Displays overall metrics such as Completion Rate, Engagement Score, Average Response Rate, and Drop-off Rate, with visual progress bars for easy interpretation.
- Engagement Funnel: Shows the total number of survey participants and tracks their progress through stages: Started, Half Completed, and Completed.
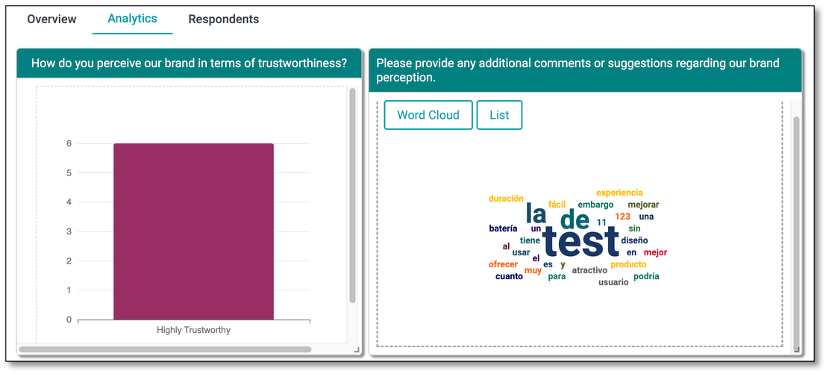
Analytics Tab
The Analytics tab presents detailed data visualizations of your survey responses to help you analyze trends and insights. It allows you to view survey responses through various visualizations such as bar charts, line graphs, and pie charts for each survey question. For open-text responses, a word cloud highlights the most frequently used words, making it easy to identify common patterns and themes. You can also switch to a list format to see a detailed breakdown of individual open-text feedback for deeper analysis.
Under the Settings icon (represented by the gear icon located within each chart), you can configure chart layouts and options. Choose vertical or horizontal orientation, toggle titles and legends, and adjust margins for alignment. Set your base field (e.g., "Choice" or "Value"), select chart types and colors, and customize axes with labels, intervals, and scaling. Advanced options let you add series labels, define color logic, and choose between column or row layouts for clearer data visualization.
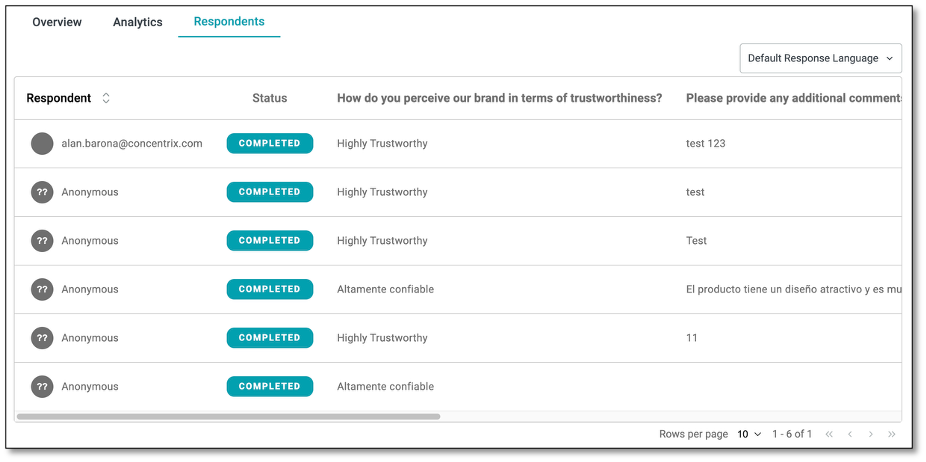
Respondents Tab
The Respondents tab provides a respondent-level view of survey data, allowing you to see individual answers, response statuses, and the time each respondent took to accomplish the survey.
Key Components:
- Respondent List: Displays each participant's email (if available), their completion status, responses to each question, and the time it took them to complete the survey (Response Time).
- Default Response Language: Lets you translate responses into a different language for easier review or revert to the original language in which the survey was answered.
Export to File
The Export to File feature allows you to download survey results in a customizable format for further analysis or reporting. You can configure export settings, select data types to include, and choose the file format that best suits your needs.
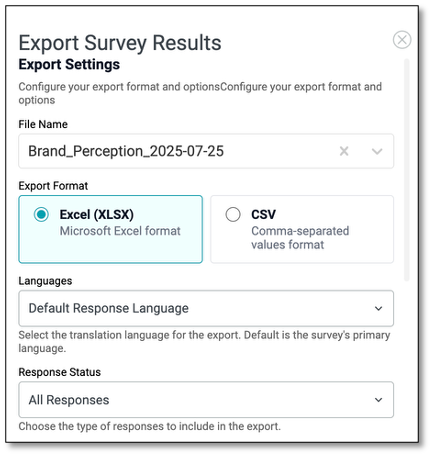
Navigating Export Settings In the Export Settings, you can specify the file name (auto-generated but editable), choose a format like Excel for easy viewing or CSV for lightweight data handling, and set the default response language to translate or keep responses in their original language. You can also filter which responses to include based on their status, such as all responses or completed only.
- File Name: Specify the name of the export file. A default name based on the survey title and date is auto-generated but can be edited.
- Export Format: Choose your preferred file format:
- Excel (XLSX): For easy viewing and manipulation in spreadsheet tools.
- CSV: For a lightweight, comma-separated values format compatible with most data systems.
- Languages: Use the Default Response Language dropdown to select the language for export. This lets you translate responses into a chosen language or keep them in the original survey language.
- Response Status: Filter responses to include in the export (e.g., All Responses, Completed Only, etc.).
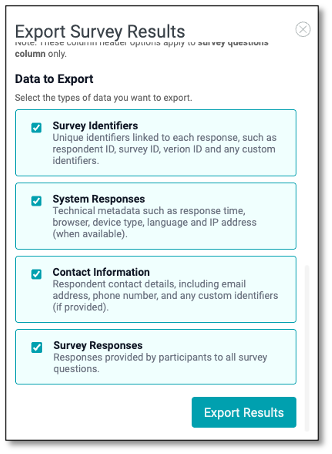
Navigating Data to Export
- Survey Identifiers: Includes unique identifiers like respondent ID, survey ID, version ID, and any custom fields.
- System Responses: Exports technical details like response time, browser type, language, and IP address (if available).
- Contact Information: Adds respondent details such as email address, phone number, and custom identifiers (when provided).
- Survey Responses: Includes participants' answers to all survey questions.
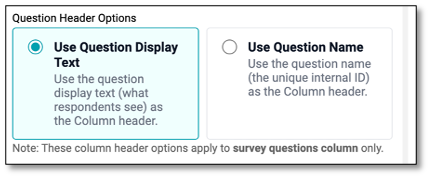
Question Header Options
- Use Question Display Text Displays the full question text (what respondents see) as column headers.
- Use Question Name Displays the internal question ID as column headers.
Once all options are configured, click Export Results button to generate and download the file.
Raw Data File The color-coded raw data file contains detailed information, including survey responses, system responses, contact details, and survey identifiers. This comprehensive dataset can be used for further analysis and reporting.

Congratulations! Now that you have completed your first survey, you are ready to utilize the many features of the DIY Survey Builder.
Explore advanced features like logic, branching, themes, translation, and more in the User Manual that will be released very soon.