Survey Administration & Settings
This part of the documentation provides guidance on the configuration of key administrative modules that are typically set up once during the initial implementation or updated as needed by the designated administrator.
These modules are essential for supporting core system functionalities, managing survey access, compliance, and ensuring the platform runs efficiently and aligns with organizational requirements.
The modules covered in this guide include:
- Setting up User Management
- Establishing Email Account
- Embedded Management – COMING SOON!
- Frequently Asked Questions
- Privacy Policy
To maintain system integrity and consistency, it is strongly recommended that only authorized administrators perform these configurations.
Setting up User Management
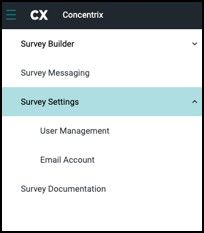
To manage user access, navigate to the menu toolbar on the left side of your screen and select the 'Survey Settings' tab. From the dropdown menu, select 'User Management'.
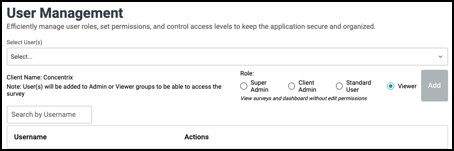
In the User Management section, you can add new users, assign roles, and manage survey access permissions. You can search for users by username using the search bar and view their access levels organized by roles.
This page helps you manage who can access the Survey Builder application. Administrators can view the list of users who currently have access, verify if a specific user is already registered, or grant new users access to the application.
- Select User(s) – Displays a list of users who already have access to ConcentrixCX application.
- Search by Username – Allows you to verify whether a user already has access to Survey Builder. If the user is not found, the administrator can add them to grant access to the application.
NOTE: A user must have an active ConcentrixCX account in order to be added to the DIY Survey Builder User Management module.
Types of User Roles:
- Super Admin Has full access to all DIY Survey features across the platform. This includes managing surveys, contacts, and distributions, as well as administrative settings such as user management and email account setup. Super Admins can also access and manage all client accounts. This role is typically assigned to specific Concentrix users.
- Client Admin Has full access within their assigned client account. They can manage surveys, contacts, and distributions, and also configure survey settings, including user management and email account setup for their client environment. They can manage users within their account except for Super Admins.
- Standard User Can create, edit, and manage surveys, contacts, and distributions within their assigned client account. Standard Users can also view and interact with dashboards but do not have access to administrative settings such as user management or email account configuration.
- Viewer Has read only access to surveys, contacts, distributions, and dashboards within the client account. Viewers can monitor results and dashboards but cannot create, edit, or manage survey configurations or system settings.
How to Add a User
To add a user, first search and select the individual from the Search User(s) field. Next, choose the appropriate role based on access permissions, assign the role, and click the Add button to complete the process. If you need to grant access to multiple users at once, you can use the multi-select option under Select User(s).

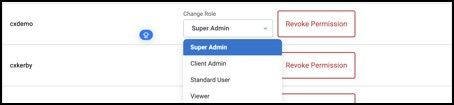
User roles can be modified at any time. You can edit or upgrade access based on permissions or revoke access entirely as needed.
NOTE: A User cannot be deleted if there are still projects assigned to them. All projects must first be reassigned to another User.
Establishing Email Account
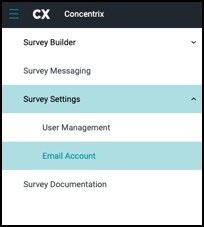
To configure an email account for survey distribution, expand the 'Survey Settings' dropdown in the left-hand menu and select 'Email Account'.
The Email Account Settings section allows administrators to configure and manage the email account used for sending surveys, notifications, and system messages. It ensures that all outgoing emails are authenticated, tracked, and delivered efficiently. For most organizations, this setup only needs to be completed once before any surveys are created. All surveys sent thereafter will automatically use the email account configured during this step.
Email Settings The Email Settings page allows you to configure and manage the domains used for sending survey invitations. This ensures your emails are authenticated, properly delivered, and recognized by recipient mail servers. Proper setup helps prevent emails from being blocked, filtered, or marked as spam.
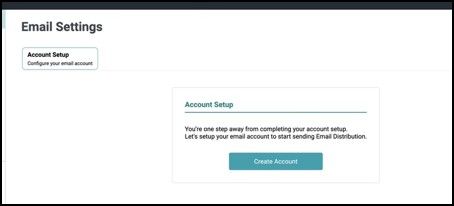
Account Setup The Account Setup page is the initial step in configuring your email sending capability. Before you can send survey invitations, you must first create and configure an email account within the system.
NOTE: For most organizations, this setup only needs to be completed once before any surveys are created.
This section allows you to establish the base email configuration required for survey distributions. Click the Create Account button to begin setting up your email account. The system will automatically create and verify the account.
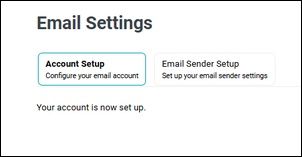
Once the email account setup is successfully completed, you will see a confirmation message indicating that your account is now set up, the Email Sender Setup tab (second tab) will be visible and enabled for the next step, and a notification will appear at the bottom of the screen confirming that the account has been successfully created.

NOTE: This step must be completed before proceeding to domain configuration or sender setup. No IT involvement for this setup.
Email Sender Setup
After completing the email account setup, proceed to the Email Sender Setup tab to configure and validate your email sending domain.
This section allows you to use the system-provided host domain for sending survey emails with minimal setup.
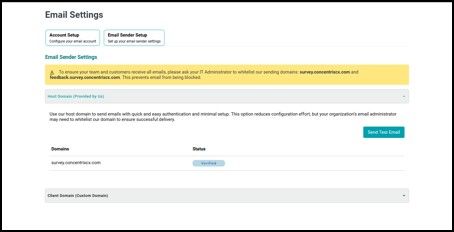
A notification banner prompting you to coordinate with your IT Administrator to whitelist the system-provided sending domains below. This is to prevent emails from being blocked.
- survey.concentrixcx.com – primary sending domain
- feedback.survey.concentrixcx.com - used as the return path; it determines where bounce or non-delivery emails are sent
Host Domain (Provided by Us)
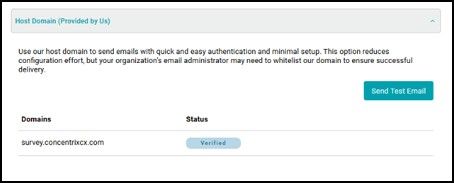
This section allows you to use the system-provided sending domain for quick and simple setup.
- Uses a preconfigured and authenticated domain.
- Requires minimal technical configuration.
- May still require your organization’s IT administrator to whitelist the domain for smooth delivery.
- Automatically displays the domain status (e.g., Verified) to confirm it is ready for use.
- Includes a Send Test Email button to validate email delivery.
NOTE: This option is recommended for faster implementation with minimal setup effort. If using the Host Domain (Provided by Us), please skip to the “Using the Configured Email in Distribution Settings” section for next steps once the above items have been completed.
Sending a Test Email
The Send Test Email feature allows administrators to validate their email sender configuration before distributing surveys. You can send a test email directly from the Email Settings screen to ensure emails are properly delivered and displayed correctly to recipients.
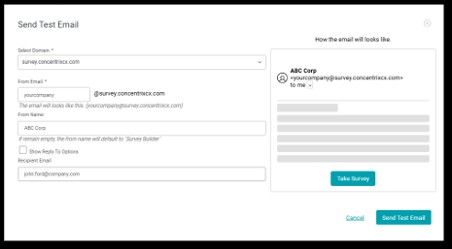
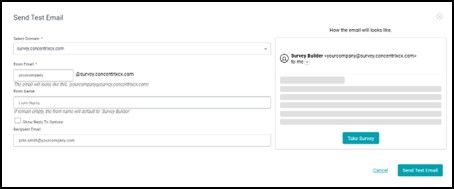
From the Email Sender Setup page, click the Send Test Email button. This will open a modal where you can configure and preview your test email. Within the Send Test Email window, complete the following fields:
- Select Domain Choose the verified domain that will be used to send the email. This includes either the system-provided host domain or your configured client domain.
NOTE: Only domain with ‘Verified’ status will appear in the drop down list.
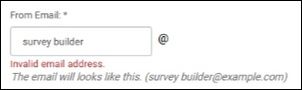
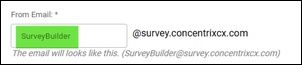
- From Email Enter the sender username. This will be combined with the selected domain to form the full email address. Example: your.company@survey.concentrixcx.com
Important Naming Rules:
- Spaces are not allowed
- Special characters are not allowed
- Use letters, or numbers only
If the From Email username contains spaces or unsupported special characters, the system will display an “Invalid email address” message. When a valid entry is provided, a confirmation message will appear below the field showing the full sender email address that will be used for distribution.
- From Name Specify the display name that recipients will see as the sender. If left blank, this will default to Survey Builder.
- Show Reply-To Options Enable this option if you want to configure a reply-to email address separate from the sender email.
- Recipient Email Enter the email address where the test message will be sent.
On the right side of the screen, a real-time preview displays how the email will appear to recipients, this helps verify branding and formatting before sending.
- Sender name and email format
- Basic email layout
- Call-to-action button such as Take Survey
Once all required fields are completed, click Send Test Email to deliver the test email message to the specified recipient. You may also click Cancel to exit without sending.
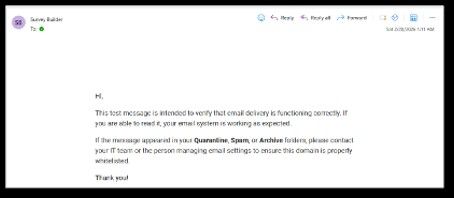
Verifying the Email Delivery
Check the inbox (or spam/quarantine folder) of the recipient email you entered. The test email will display the sender address exactly as configured in the system, allowing you to confirm that:
- The correct sender email is being used
- The message successfully passes through your organization’s email filters
- The domain and sending infrastructure are functioning as expected
A typical test message includes a note indicating that the email was generated for validation purposes, along with reminders to whitelist the domain if needed.
NOTE: If the test email appears in Quarantine, Spam, or Junk, you may need to coordinate with your IT Administrator to whitelist the sender email, sending domain, or email service provider. Once this is completed, send another test email to confirm successful delivery.

If you need to customize the sender email using your organization’s domain, navigate to the Client Domain section and follow the setup process below. This requires close coordination with your IT Administrator to configure DNS records and ensure successful setup.
Client Domain (Custom Domain)
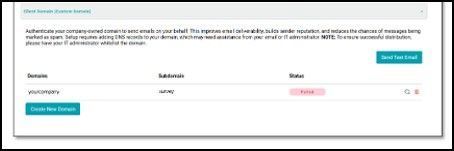
The Client Domain section allows you to configure and manage your organization’s own branded domain for sending survey emails. Using a custom domain improves email deliverability, strengthens sender reputation, and enhances brand consistency for recipients. However, this option requires involvement from your IT administrator to ensure proper setup and configuration.
Domains Table Overview
The table displays all configured client domains and their current status.
-
Domain field is where you enter your organization’s main domain name. Example: yourcompany.com. This should be a domain that your organization owns and manages. Proper DNS access is required to complete the authentication process, and you will need to work with the appropriate contacts in your IT team to configure the necessary DNS settings.
-
Subdomain field allows you to define a dedicated subdomain that will be used for email sending. Example: survey.yourcompany.com or mail.yourcompany.com
-
**Status **indicates whether the custom domain and subdomain have been successfully verified and authenticated for sending emails
-
Actions provides options to manage the domain, such as: View or verify DNS configuration and Delete the domain if no longer needed
NOTES: The subdomain is used as the Return-Path for email delivery. To prevent delivery issues, your IT administrator should whitelist this subdomain. Some email security systems may flag messages if the Return-Path differs from the From address, so coordination with your IT team is recommended to ensure proper configuration and successful email delivery.
Create New Domain
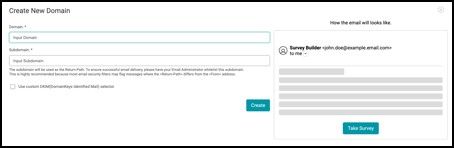
Click Create New Domain button to add a new custom domain. You will be guided through the process of:
- Entering your domain and subdomain
- Configuring required DNS records (SPF, DKIM, and possibly DMARC)
- Verifying the domain before it can be used for sending emails
NOTE: DNS configuration is required and must be completed through your domain provider. You will need to coordinate with your IT administrator to ensure proper setup, and please note that domain verification may take some time due to DNS propagation delays.
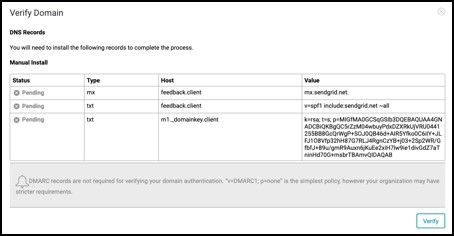
Upon clicking the Create button, the Verify Domain screen will display the DNS records required to enable email sending. Share these records with your IT Administrator, who will need to add them exactly as provided in your DNS settings. Once the records are configured, click Verify to confirm they are correctly set up. After successful verification, your domain will be ready to send emails.
Use Custom DKIM Selector
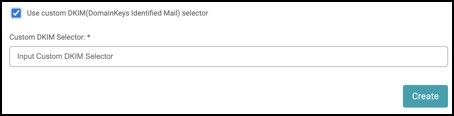
This optional setting allows you to define a custom DKIM selector.
DKIM is used for email authentication to verify that messages are legitimately sent from your domain. This option is typically configured by your IT or email administrator if your organization follows specific DKIM naming conventions.
If left unchecked, the system will use the default DKIM configuration.
Email Preview Panel
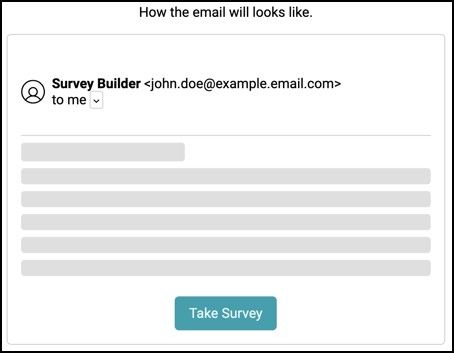
The right side of the page displays a preview showing how the email will appear to recipients. It demonstrates how the email will appear to recipients, including the sender name, the sender email format, and a sample layout of the survey invitation.
This preview helps you visualize how the configured domain will be presented in recipients’ inboxes. Then click Create to initiate the domain setup process.
After creation, you will be required to configure DNS records such as SPF, DKIM, and possibly DMARC. The domain must be verified before it can be used as an active sender. These steps require coordination with your IT administrator to ensure proper configuration.
Sending a Test Email
The Send Test Email feature allows administrators to validate their email sender configuration before distributing surveys. You can send a test email directly from the Email Settings screen to ensure emails are properly delivered and displayed correctly to recipients.
From the Email Sender Setup page, click the Send Test Email button. This will open a modal where you can configure and preview your test email. Within the Send Test Email window, complete the following fields:
- Select Domain Choose the verified domain that will be used to send the email. This includes either the system-provided host domain or your configured client domain.
NOTE:. Only domain with ‘Verified’ status will appear in the drop down list.
- From Email Enter the sender username. This will be combined with the selected domain to form the full email address. Example: your.company@survey.concentrixcx.com
- From Name Specify the display name that recipients will see as the sender. If left blank, this will default to Survey Builder.
- Show Reply-To Options Enable this option if you want to configure a reply-to email address separate from the sender email.
- Recipient Email Enter the email address where the test message will be sent.
On the right side of the screen, a real-time preview displays how the email will appear to recipients, this helps verify branding and formatting before sending.
- Sender name and email format
- Basic email layout
- Call-to-action button such as Take Survey
Once all required fields are completed, click Send Test Email to deliver the test email message to the specified recipient. You may also click Cancel to exit without sending.
Verifying the Email Delivery
Check the inbox (or spam/quarantine folder) of the recipient email you entered. The test email will display the sender address exactly as configured in the system, allowing you to confirm that:
- The correct sender email is being used
- The message successfully passes through your organization’s email filters
- The domain and sending infrastructure are functioning as expected
A typical test message includes a note indicating that the email was generated for validation purposes, along with reminders to whitelist the domain if needed.
NOTE: If the test email appears in Quarantine, Spam, or Junk, you may need to coordinate with your IT Administrator to whitelist the sender email, sending domain, or email service provider. Once this is completed, send another test email to confirm successful delivery.
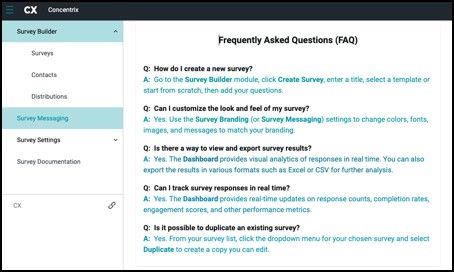
Frequently Asked Questions (FAQ Page)
To further assist survey respondents in creating and navigating the survey, you can create a Frequently Asked Questions (FAQ) page. This section helps address common concerns or difficulties respondents may encounter in creating a survey.
To create an FAQ section, go to the top-left toolbar menu, click 'Survey Messaging', and then choose 'FAQ' tab.

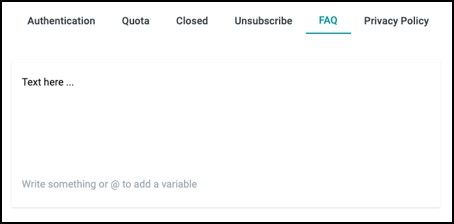
The Survey Builder opens to a default FAQ page that provides commonly used information to help you get started. You can customize the content of this page to better fit your specific needs.
NOTE: Any customization or modification made to the survey messaging modules through Templates (e.g., FAQ, Unsubscribe, Privacy Policy, etc.) will apply globally and affect all surveys under the client or account you are working on. Ensure changes are reviewed carefully before implementation. Before we begin creating your message, we will first explain how to navigate the Templates and Appearance Options panels found on the right-hand side of the page. These panels provide the tools you'll need to start building your template and customizing the look and feel of your messages.
Navigating the Templates & Appearance Options Panels
The Templates section allows you to manage and select pre-designed layouts for your FAQ.
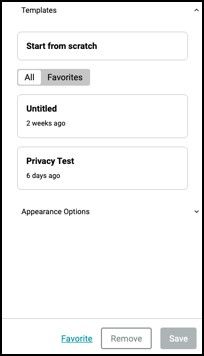
- Start from Scratch Select this option if you want to build a FAQ from a blank slate without using any pre-configured styles or content.
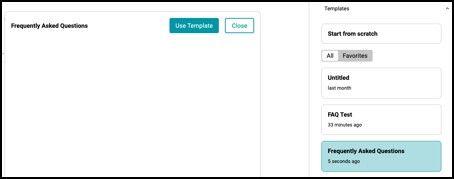
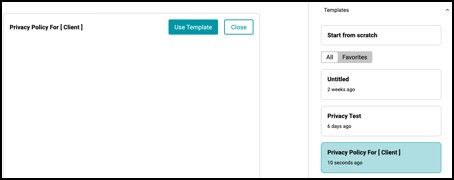
- Existing Templates Previously created templates will appear in a list with their respective names and timestamps. You can click on any of these to reuse or edit them for your FAQ.
- Favorites Tab You can tag frequently used templates as Favorites for quick access. Switch between All and Favorites using the toggle buttons to filter the list.
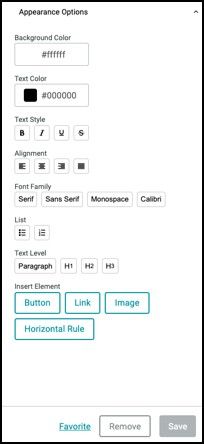
The Appearance Options panel allows you to customize the visual style and formatting of your message or template. Below is a breakdown of the available controls:
Colors
- Background Color – Set the background using a HEX code or color picker
- Text Color – Define text color for readability and branding
Text Formatting
- Text Styles – Bold, Italic, Underline, Strikethrough
- Alignment – Align text to the left, center, or right
- Font Family – Choose from Serif, Sans Serif, Monospace, or Calibri
- Lists – Add bulleted or numbered lists
- Text Level – Select Paragraph, H1, H2, or H3 for structure
Insert Elements
- Button – Add a clickable call-to-action
- Link – Insert hyperlinks
- Image – Upload visuals
- Horizontal Rule – Add dividers between sections
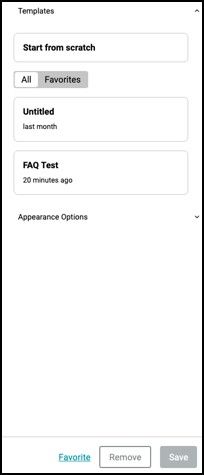

Once a template is created or selected, you can mark it as a Favorite, Remove it, or Save any changes you've made.
NOTE: Any customization or modification made to the survey messaging modules through Templates (e.g., FAQ, Unsubscribe, Privacy Policy, etc.) will apply globally and affect all surveys under the client or account you are working on. Ensure changes are reviewed carefully before implementation.
Creating your FAQ
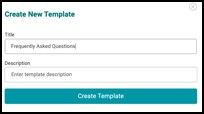
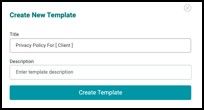
To create your message or text, you can either start from scratch or choose an existing template. Once you've selected a template, you will be prompted to enter the Title and Description, then click the Create Template button to proceed.
Your new template will appear under the Templates list. Click on it to begin setting up your FAQ content.
Type your message in the text editor provided. Go to Appearance Options to customize the style, formatting, and layout of your text.
NOTE: The FAQ Page is made available and can be accessed by the survey respondents through the link located at the bottom of the survey invitation email. This link is only available when the survey is sent or distributed through an email invitation.

Privacy Policy Page
To enhance transparency and reassure respondents about how their data / responses will be handled, you can create a dedicated Privacy Policy Page within the survey.
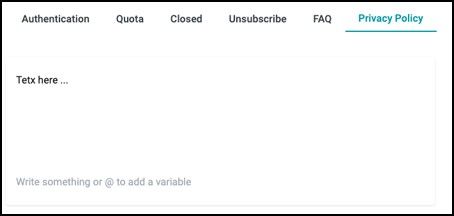
To do this, navigate to 'Survey Messaging' from the top left toolbar menu and select 'Privacy Policy' tab.

The Privacy Policy module allows you to define and communicate how user data is collected, used, and protected within your survey or application.
Within this module, you will find a text box where you can write a clear and concise explanation of your data collection and usage policies. This may include details about what types of data are collected, how the data will be used, who will have access to it, and how long the data will be retained.
Before we begin creating your message, we will first explain how to navigate the Templates and Appearance Options panels found on the right-hand side of the page. These panels provide the tools you'll need to start building your template and customizing the look and feel of your messages.
Navigating the Templates & Appearance Options Panels
The Templates section allows you to manage and select pre-designed layouts for your Privacy Policy.
- Start from Scratch Select this option if you want to build a Privacy Policy from a blank slate without using any pre-configured styles or content.
- Existing Templates Previously created templates will appear in a list with their respective names and timestamps. You can click on any of these to reuse or edit them for your Privacy Policy.
- Favorites Tab You can tag frequently used templates as Favorites for quick access. Switch between All and Favorites using the toggle buttons to filter the list.
The Appearance Options panel allows you to customize the visual style and formatting of your message or template. Below is a breakdown of the available controls:
Colors
- Background Color – Set the background using a HEX code or color picker
- Text Color – Define text color for readability and branding
Text Formatting
- Text Styles – Bold, Italic, Underline, Strikethrough
- Alignment – Align text to the left, center, or right
- Font Family – Choose from Serif, Sans Serif, Monospace, or Calibri
- Lists – Add bulleted or numbered lists
- Text Level – Select Paragraph, H1, H2, or H3 for structure
Insert Elements
- Button – Add a clickable call-to-action
- Link – Insert hyperlinks
- Image – Upload visuals
- Horizontal Rule – Add dividers between sections
Once a template is created or selected, you can mark it as a Favorite, Remove it, or Save any changes you've made.
NOTE: The Save button becomes active only after edits are made. Any customization or modification made to the survey messaging modules through Templates (e.g., FAQ, Unsubscribe, Privacy Policy, etc.) will apply globally and affect all surveys under the client or account you are working on. Ensure changes are reviewed carefully before implementation.
Creating your Privacy Policy
To create your message or text, you can either start from scratch or choose an existing template. Once you've selected a template, you will be prompted to enter the Title and Description, then click the Create Template button to proceed.
Your new template will appear under the Templates list. Click on it to begin setting up your Privacy Policy content.
Type your message in the text editor provided. Go to Appearance Options to customize the style, formatting, and layout of your text.
NOTE: The Privacy Policy Page is made available and can be accessed by the survey respondents through the link located at the bottom of the survey invitation email. This link is only available when the survey is sent or distributed through an email invitation.
